Here are the process pictures and notes on my latest work, 1/4 scale miniature bow saws.
The decision to make these came abruptly. I was dreaming of tools that had more wood parts than metal and my mind quickly went to bow saws. I was not thinking about the coarse blade, big bow saws for rough cutting, but a smaller one with a fine blade for detail work. Some folks call them "frame turning saws" because the blade can be turned for more clearance.
I looked at many antique examples on the Internet, as well as free available planes for general dimensions. Usually I like to work from a antique example that I own, but I do not have one at this time. Gramercy Tools, a tool company based in New York makes a 12" bow saw that I thought was the right size to get dimensions from. I used their dimensions for overall width and thickness of the limbs, sizing of hardware, and size of the mortises. I did make the limbs longer and wider than the Gramercy saw so I would have enough material to make the curves more exaggerated, and the top of the limbs more curved inward.
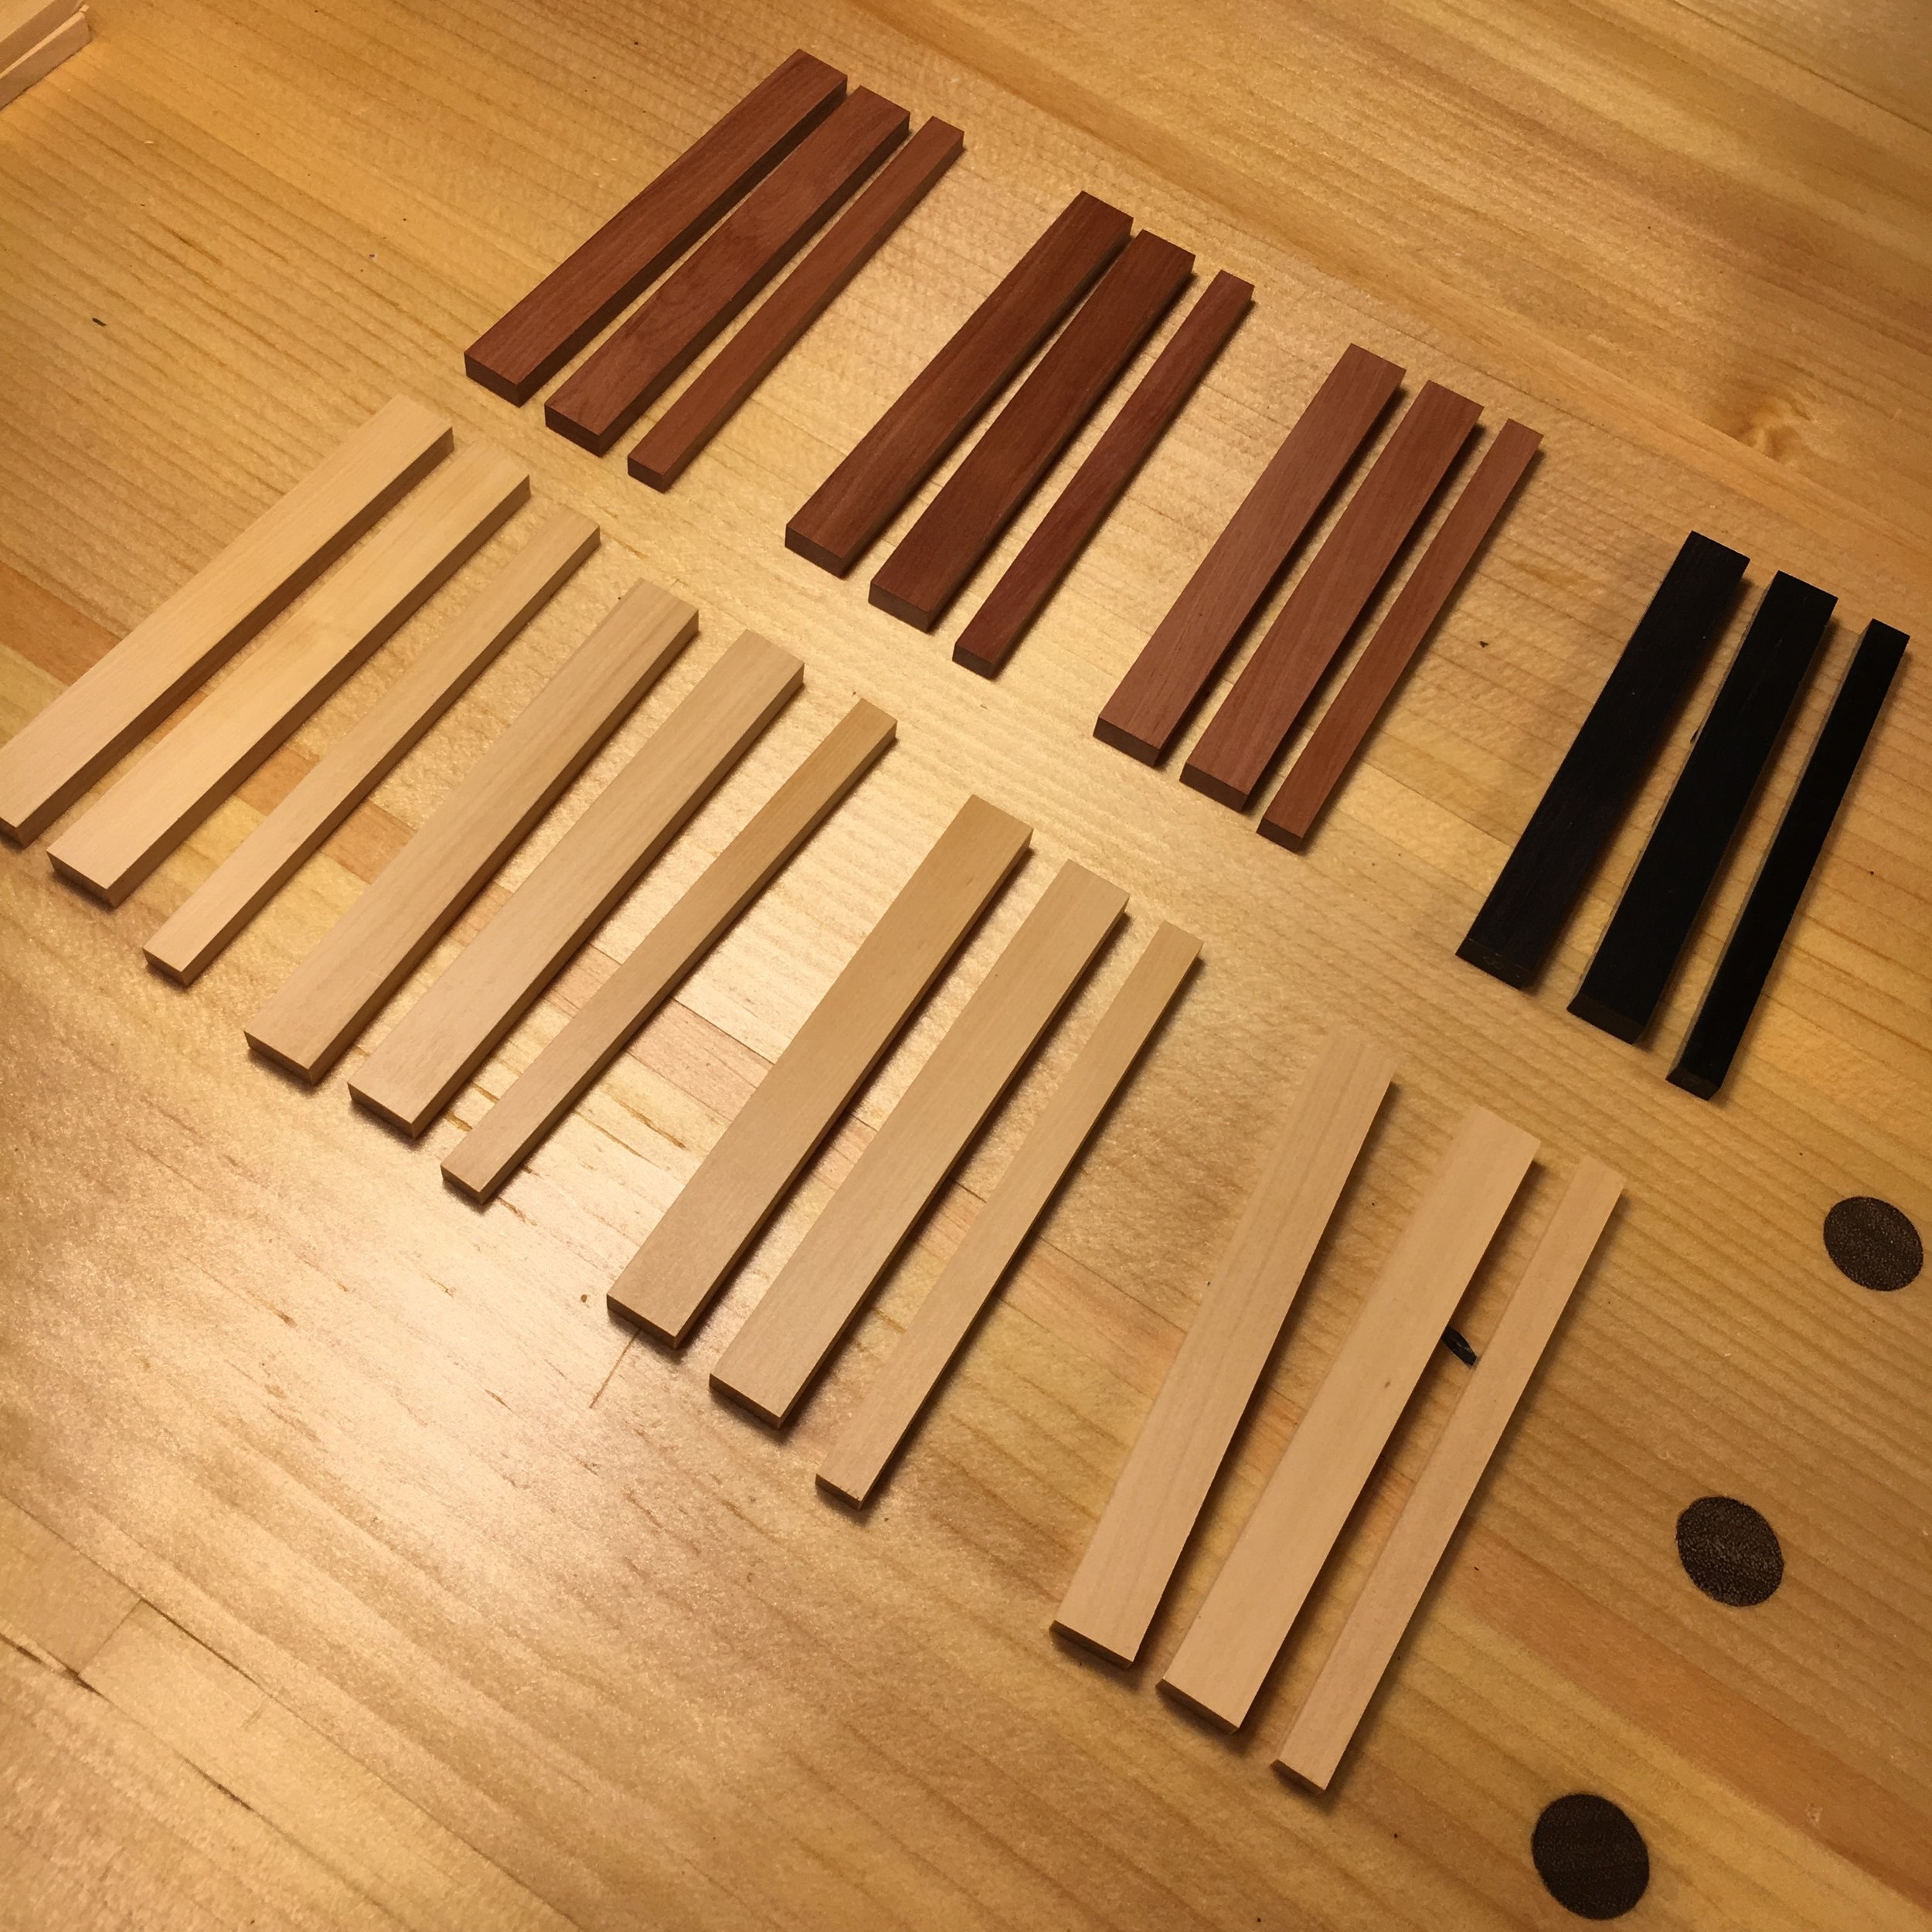
Once I had the dimensions worked out, I prepared the stock to make 8 Saws. 4 in Boxwood, 3 in Mountain Mahogany, and one African Blackwood. I chose these woods because they are dense enough to support fine details and the grain is very tight, making it look proper scale in close up photos. I milled the stock to size using a 7" Ammco metal shaper. I ground a HSS cutter with a big radius for smooth cuts. I use the shaper because it cuts in a straight line with the grain, leaving the stock very smooth and accurate. I milled the limbs and stretcher stock for each from the same pieces of wood, because of the color variation across different pieces of the same wood.

Rough milled stock
I gang cut the pieces to length using masking tape to hold them together. I used a 4" miniature table saw with cross slide fence to chop the length.

In my opinion, crispy square stock is essential for making accurate miniatures (anything really). I try to make the surfaces as smooth as possible even if that whole surface will be removed. This makes it easier to achieve accurate measurments and machining setups during the process.

(Side note) The latest machine I added to my arsenal is a Deckel GK-21 Pantograph. I learned about these machines a few years ago from fellow Miniature tool maker Paul Hamler. Through Paul's process pictures I have dreamed up many different pantograph setups. For those unfamiliar, a pantograph is like a copy milling machine that scales the movement of the tracer and cutter. A 2d template or 3d pattern can be traced on one side and the cutter on the other size will replicate the movement at a scaled rate. It can also be used for fine line engraving. Really, it is only limited to what your brain can dream up as far as fixtures and templates go. I have yet to scratch the surface. These days they are not used much in industry because of CNC. I realized its importance in the miniature making shop and have been looking for a clean one since. In April, I found a really nice and clean one at a consignment auction. It has become my favorite machine.
Now that I have this machine I have been thinking about how I can use it for each miniature. The bow saw was the perfect one to try because it has 2 limbs that need to be identical. Finished parts do not roll off the pantograph, I use it to rough shapes out very accurately. I am all about doing things by hand and eye, if I was making only one of these saws I would never go through the trouble of setting up the pantograph. I would just use a fret saw, files and sandpaper. Since I set out to make 8 saws, I needed 16 identical limbs. This is where the pantograph shines.

Deckel GK21 pantograph
First order of operation once I had my stock to size was milling the limb mortise and the trough hole for the handle hardware. I failed to take pictures of the setup, but I milled them on a Sherline mill with a 1/16" end mill and a work stop to make sure the mortise locations were consistent for each limb. Below is a picture of a test piece to make sure the mill was dead center before I proceeded to the real thing. These little pieces are the off cuts from the milling stage, so the thickness is the same as my limb blanks.

Mortise alignment test pieces
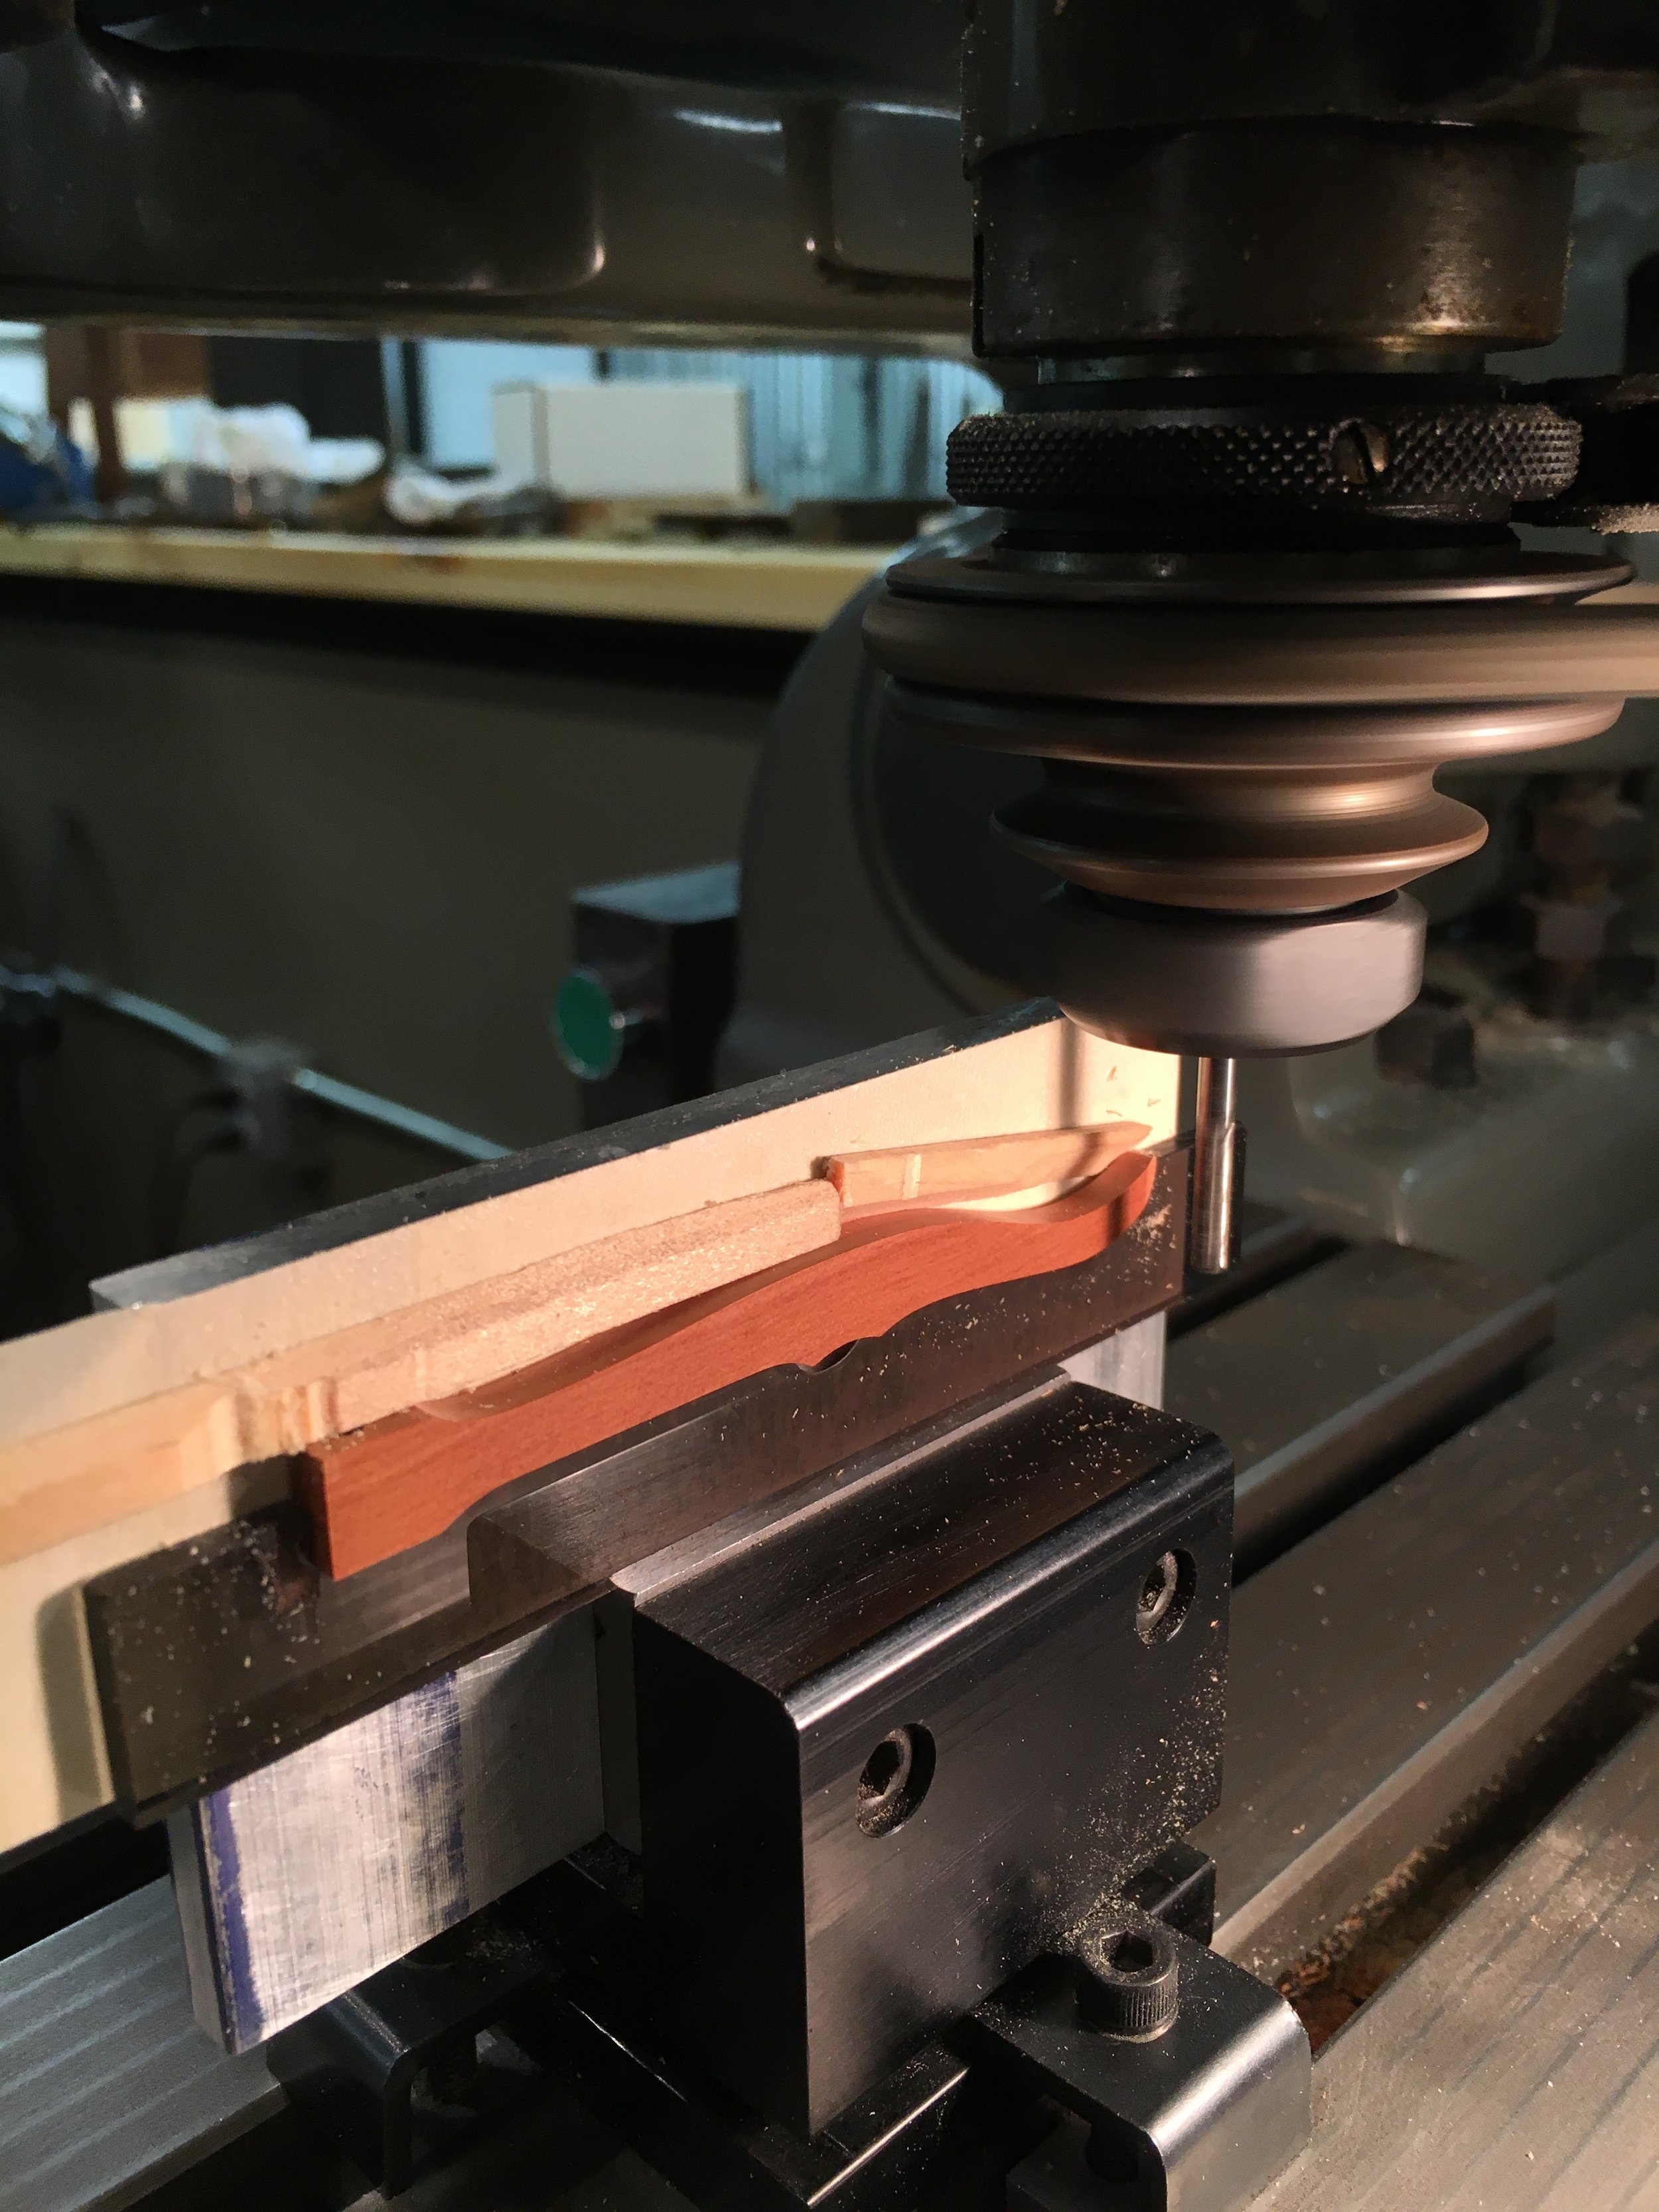
Next was milling the front profile of the limbs. I made a full scale drawing and wood template to be used on the pantograph at a 4:1 ratio. The template was cut on the band saw and carefully shaped with curved sanding blocks. The curved template was attached to a rectangular piece of wood that is the scaled up dimensions of my limb blanks. It also has a piece nailed to the bottom that is the width of the pantograph tracer table slots. This allows it to sit square with the machine.
I mounted a vise to the pantograph table with a sacrificial block of wood in it. I used the pantograph to skim cut the wood parallel to the table. I also used the square side of the template to mill a slot in the sacrificial block so I could pop in a fence to hold my limb blank parallel to my template.

Full scale limb template

pantograph limb setup
Pictured below is the limb blank pressed against the temporary steel fence. It is held down with double stick masking tape. The tape has plenty of holding power for tiny wood milling, and I can peel it off without damaging the wood.
I used the lower rectangle on the template to locate my blank on center in the machine. I put the tracing arm against the long flat side of the template and slowly advanced the blank until the cutter was dusting the blank. I then put the tracer on the short flat side of the template and advanced the blank until it was dusting that edge. Now the blank is located properly with my template.

I milled away the edge to my template. A major advantage to the pantograph is being able to control all movement with your hand. I can cut really light where the grain would be prone to tear out and a little heavier when the grain is supported. Once I cut the first side, I took out the steel fence and stuck down a wood scrap against the already milled side to keep it from shifting. Then I milled the back side to my template. This process was done 16 times.


Before I started on the edge profiles, I used the first template to mill each side profile into pieces of Plexiglas. I used these Plexiglas "parallels" to hold the now curved parts parallel in the machine despite not having a square reference face anymore. Hard to explain but easy to see in the photographs. For the side template I only had to make one side because both sides have the same profile, I just flipped the blank. I put a bar of aluminum in the vise, double stick taped the Plexiglas parallel with my part tightly nested in. I stuck scraps of wood around it to keep it from moving. I then milled each side profile, flipping just the blank and using the alternate parallel to hold the other side. I somehow missed the photos of the other side.
Milling side profiles

Side profile pantograph setup


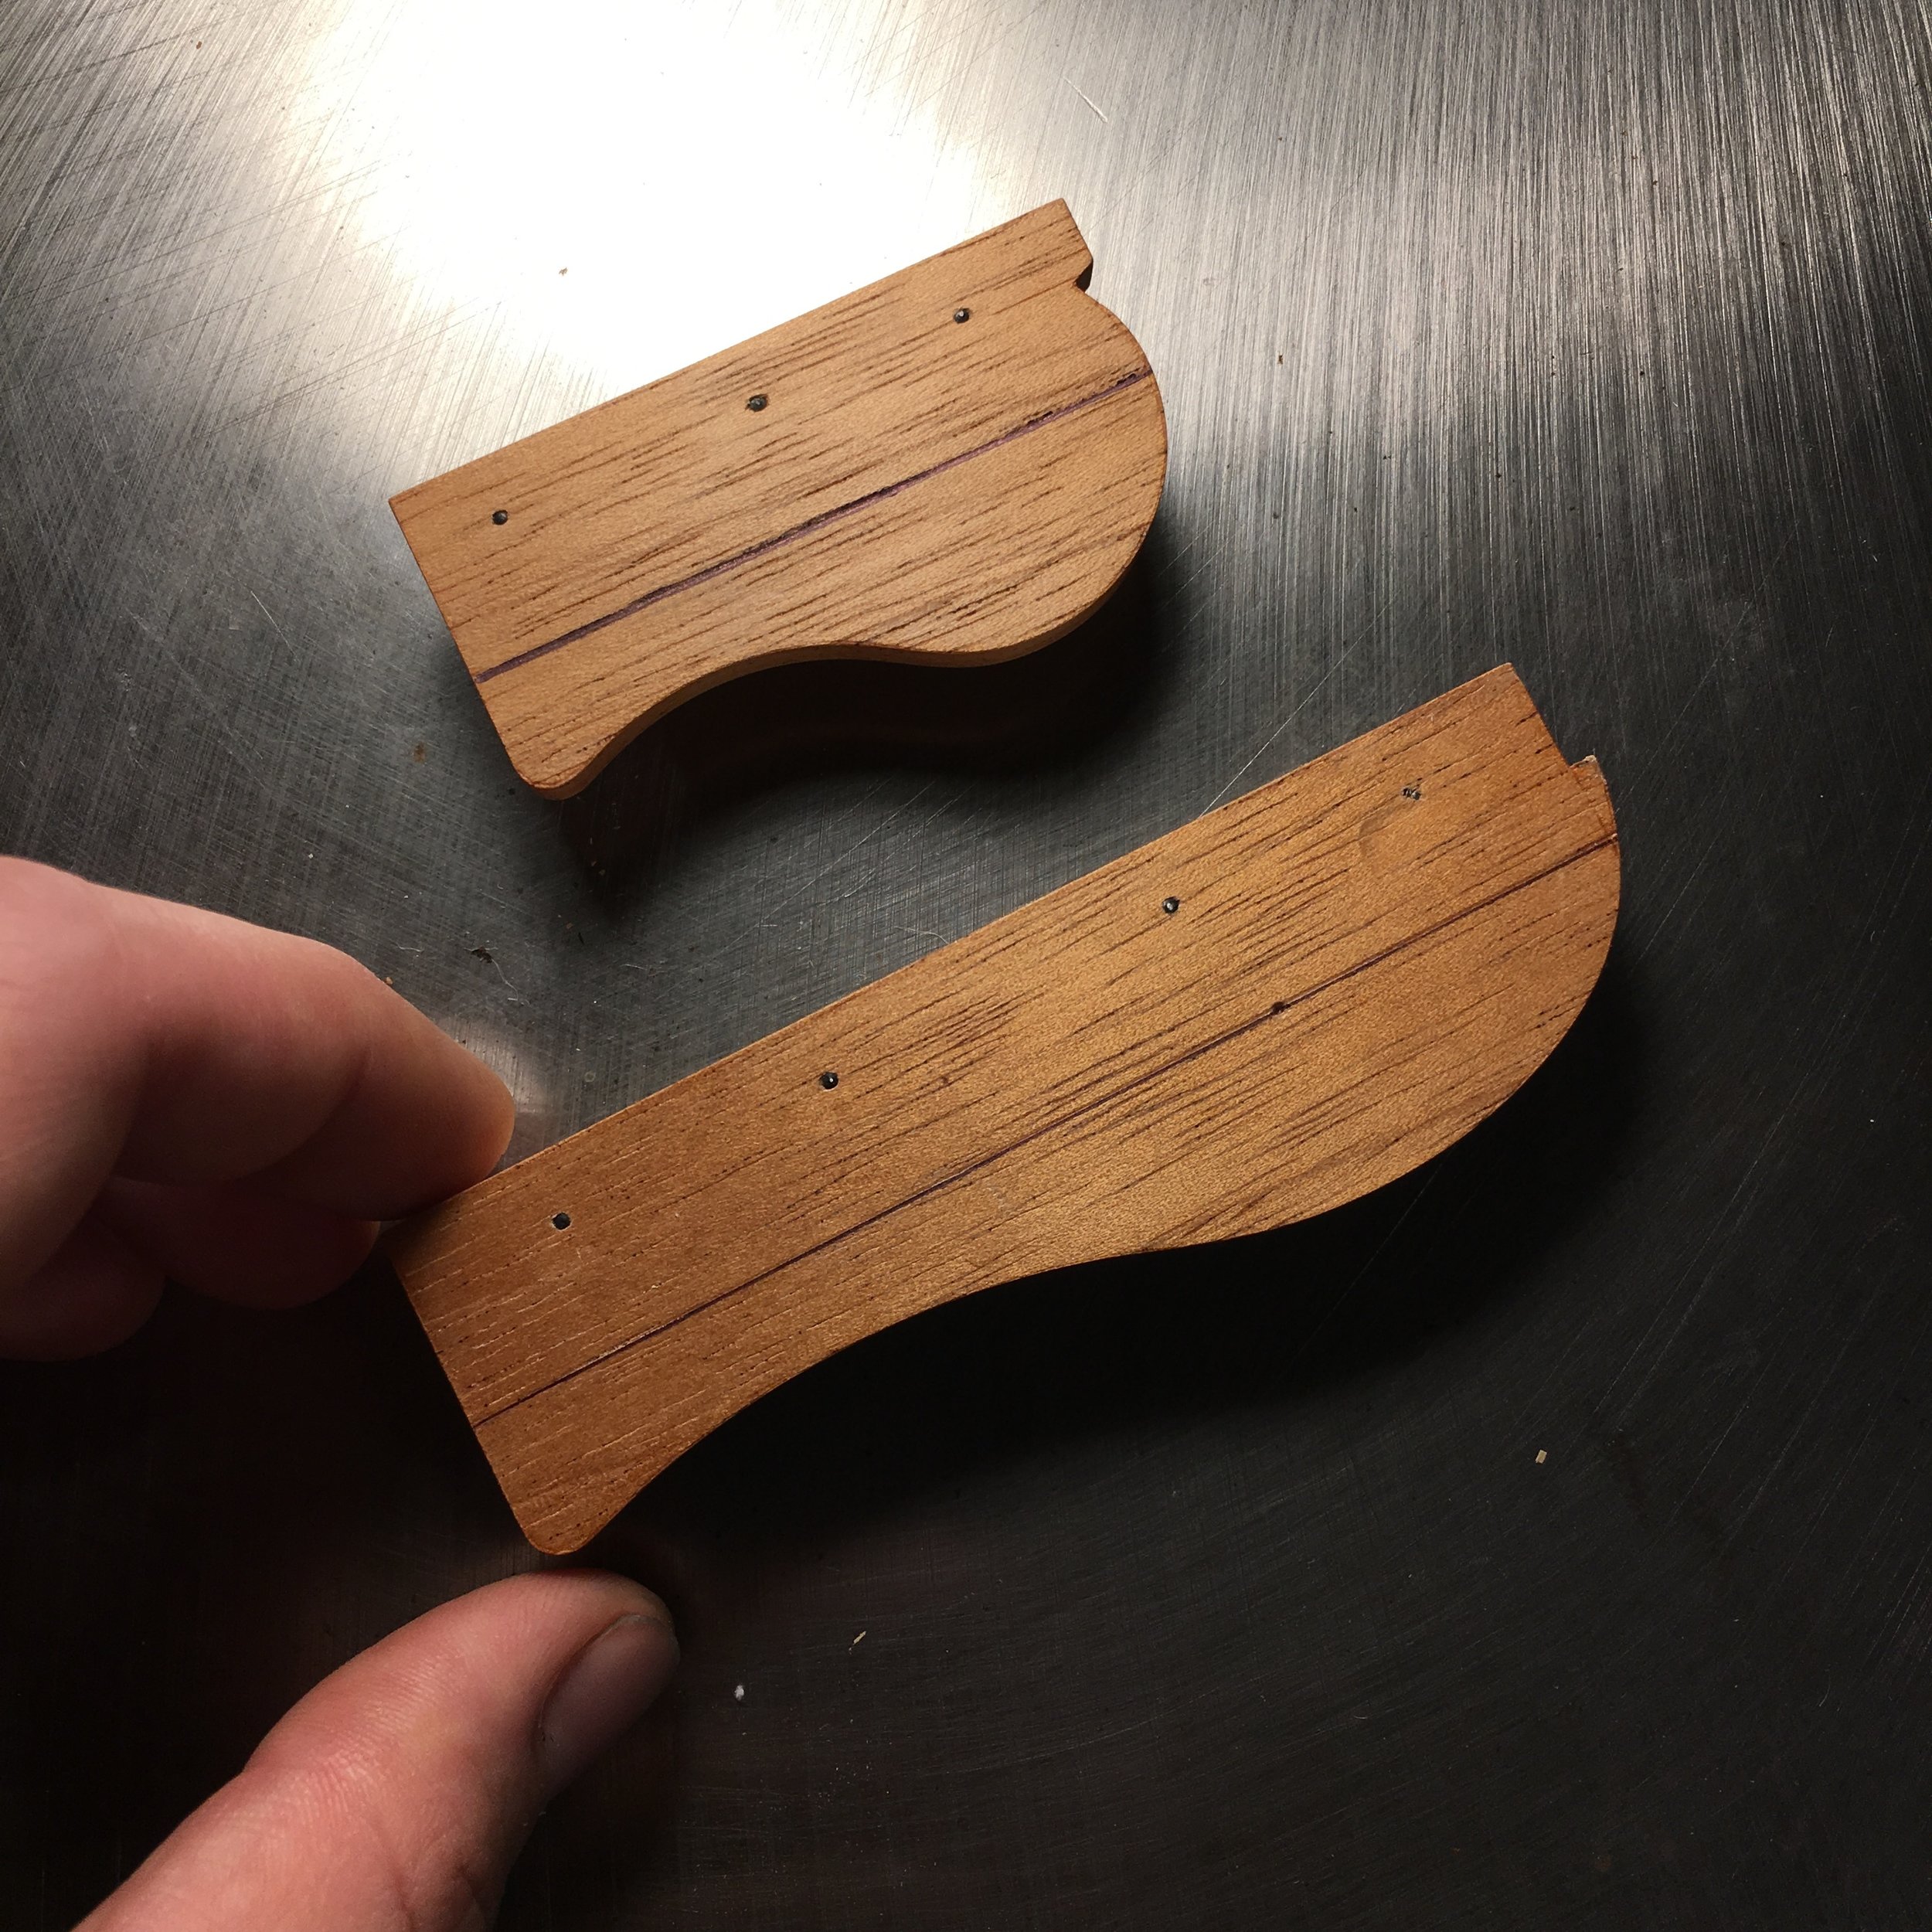
I decided to make the stretcher joint curved like most bow saws trough history. I took note of the radius measurement I used on the limbs and made a curved template the same radius. The piece it is nailed too is the scaled width of my stretcher blank, I use those edges to referance my blank on center once it was setup In the machine. The curved part extends past those edges so I don't accidentally roll the tracer off the edge and mess up the stretcher.

I held the stretchers in a vise with a stop block on the back side. I set the depth so I would be left with a 1/16" tenon once I milled both sides. I milled, flipped and turned each one until all 4 sides were milled, using the stop block for repeated accuracy. The remaining material on the tenons was removed with chisels under the microscope.


I also used the pantograph to put a gradual chamfer on the stretchers. I made a wood template with a long curved face. Using a 45 degree cutter in the spindle I cut the chamfers in the stretchers.


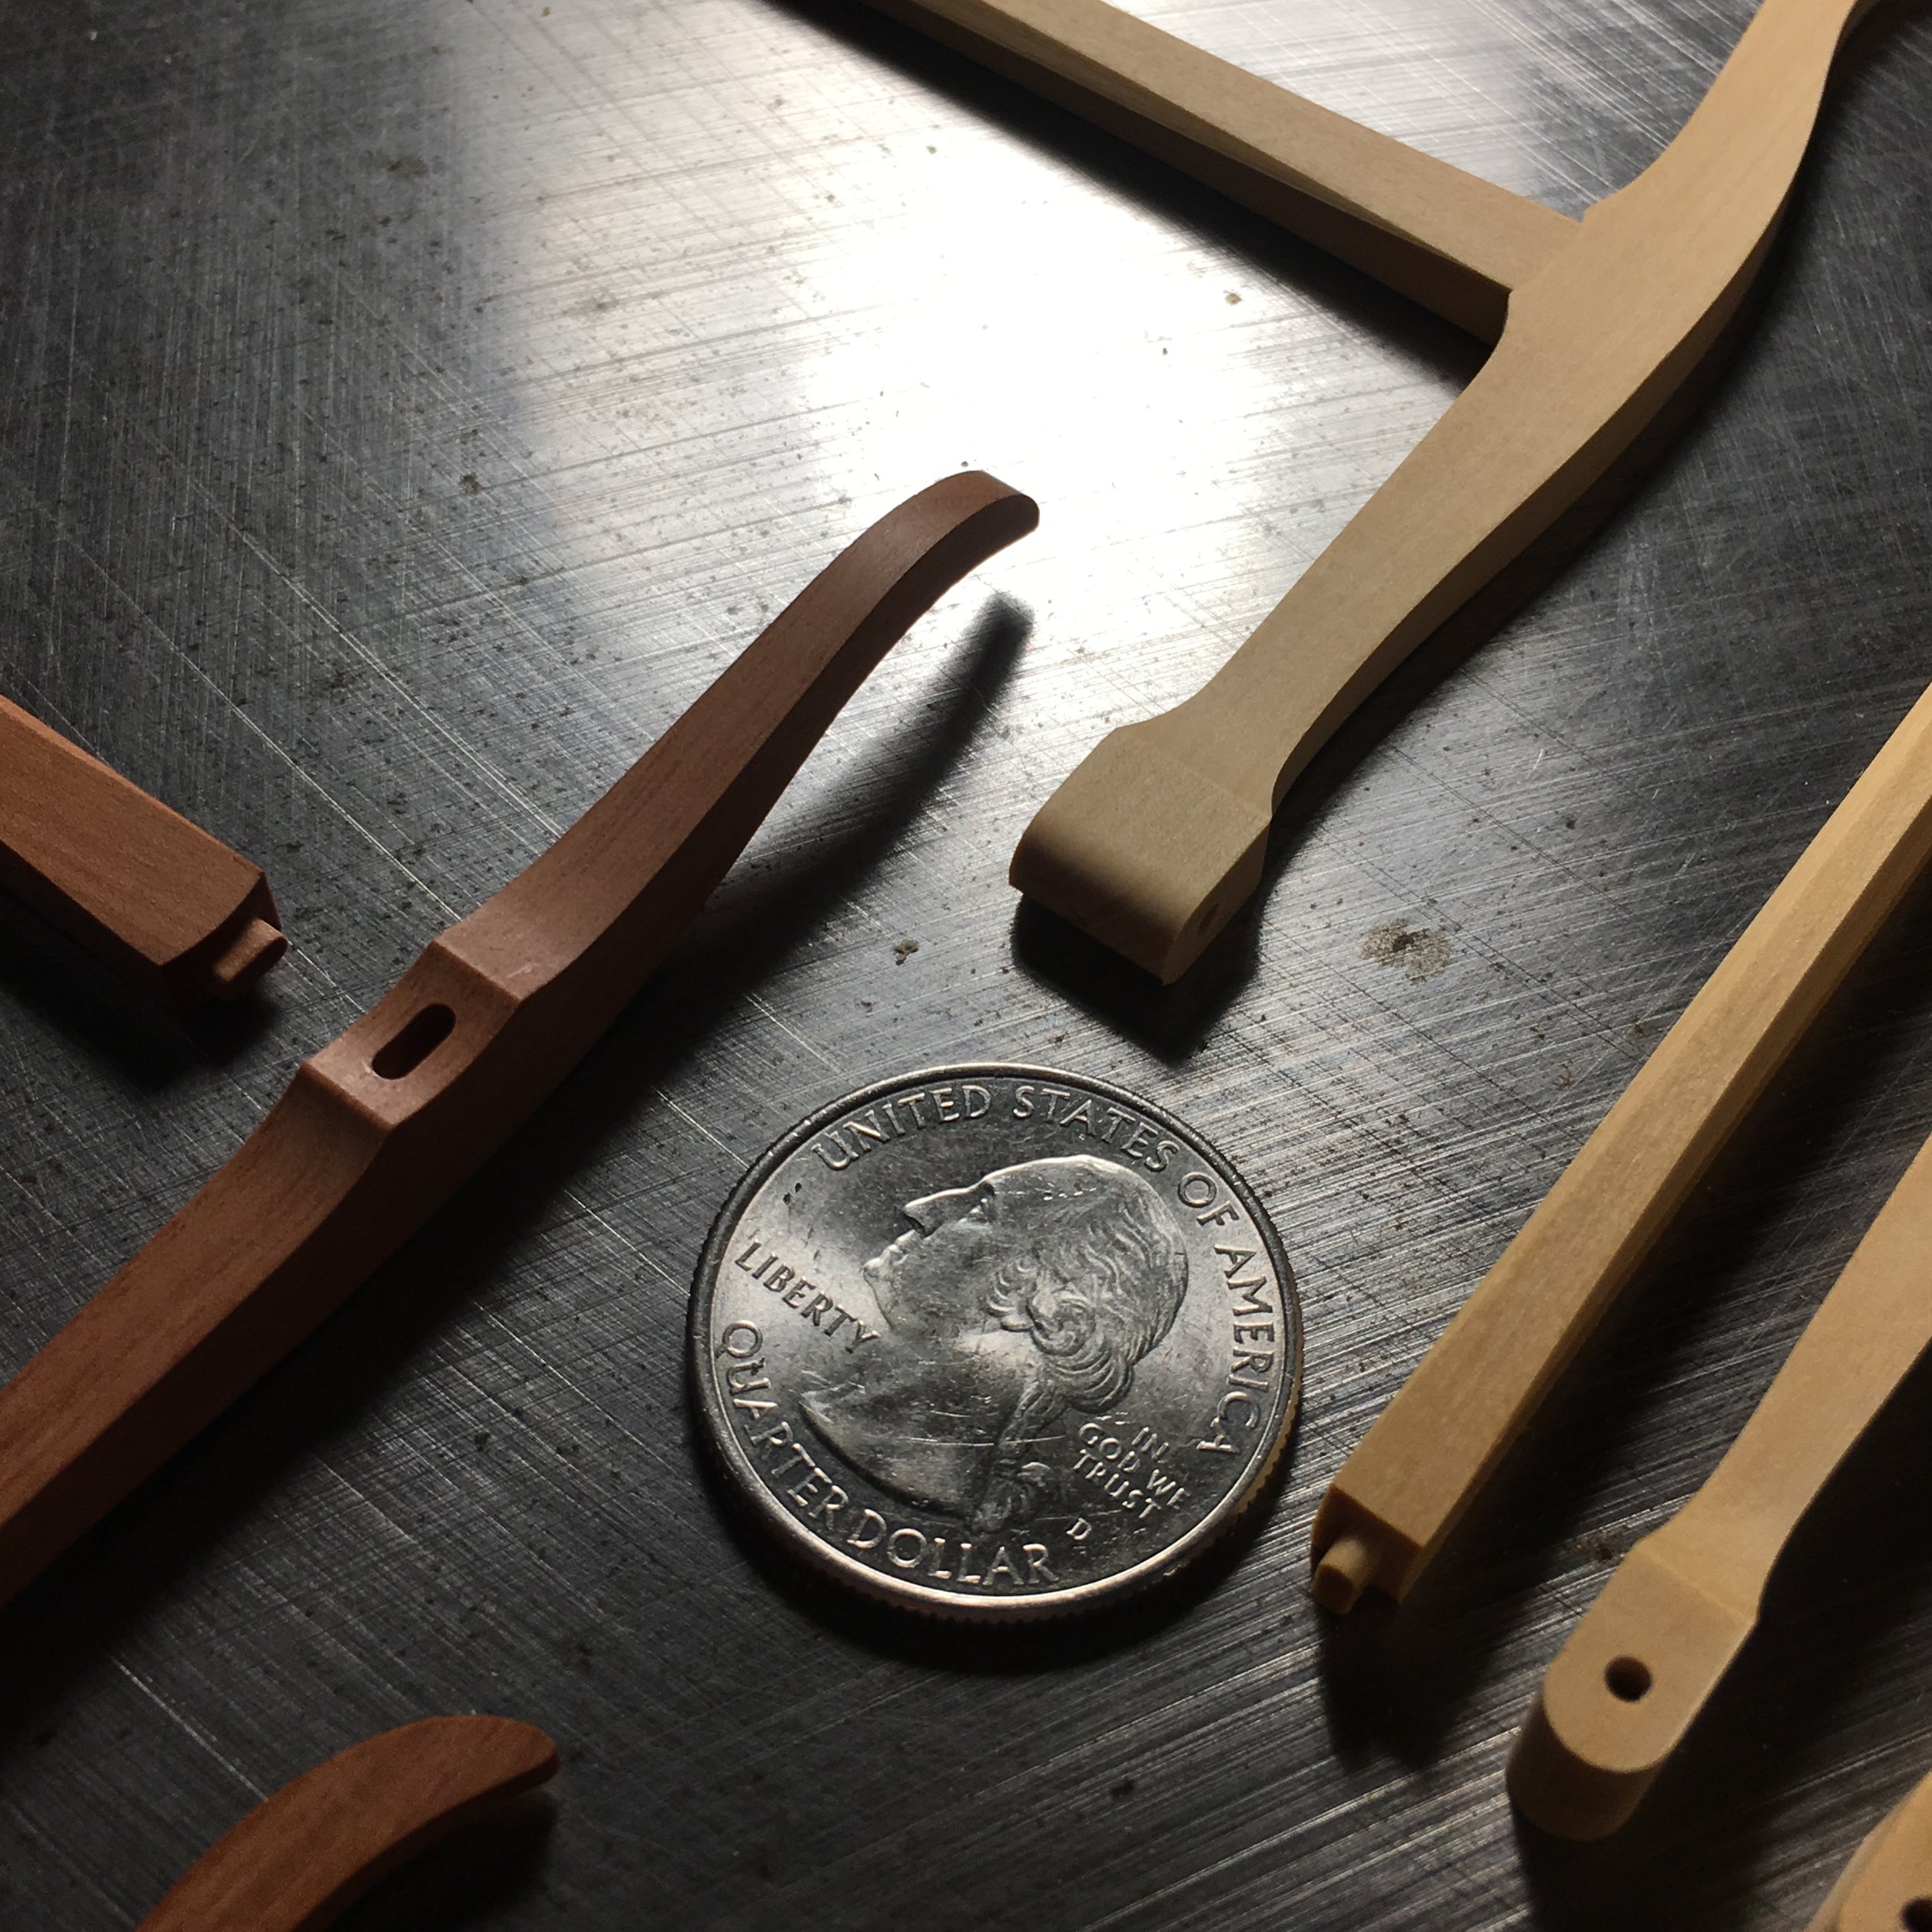
Handles
I have always loved octagon handles on everything. Now that I have a pantograph I finally have a good way to make multiples of them all the same, in a reasonable amount of time. I made 2 full scale, one sided handle templates from wood. Then I used a indexing fixture with a 4 jaw chuck to hold my handle blanks on the pantograph. I milled each side of the handles, turning it 8 times to do the whole handle. It took about 15 minutes to rough mill each handle. There is a video of this on my Instagram. Disclaimer: Many people commented that my fingers are too close to the cutter. Although they may have been close, I find it no more dangerous than using a whittling knife, or chopping onions. When I do this, it is late night, just me and the machine. I am controlling the cutter with my hand and I am ultra aware of where my fingers are. Because the material has to stick far out of the chuck to clear the spindle my finger is feeling for deflection in the workpiece. I am not a professional by any stretch of the imagination, do not take my process as the right way. I just try things until it works for me, attempt things with your best judgment.


After I milled the octagon faces I brought the pieces to the lathe and drilled the holes for the hardware. I first turned the square shank round, then parted it off with about 1/4" of the round left. Having the shank round and concentric with he handle, I then turned them back around in the chuck and drilled the hole. Once again, I turned them around in the chuck and parted off the handle to proper length.

I made the metal hardware from 12L14 steel because I prefer the color to brass and they would be much stronger for machining on a small scale. 12L14 steel cuts amazing for small parts because it has lead added to it. Some call it free machining steel.


After I turned the diameter to 1/16" I used a free hand graver to ball over the end of each blank.

I made a brass donut to slip over the long thin pin to prevent deflection when I cut the slot for the blade. I put the piece in the v of the vise with the end to be cut hanging off the edge. I used a scrap piece the same diameter in the opposite end of the vise to achieve even clamping pressure. I used a slitting saw to cut the slot. Somehow I neglected to take pictures of this setup.
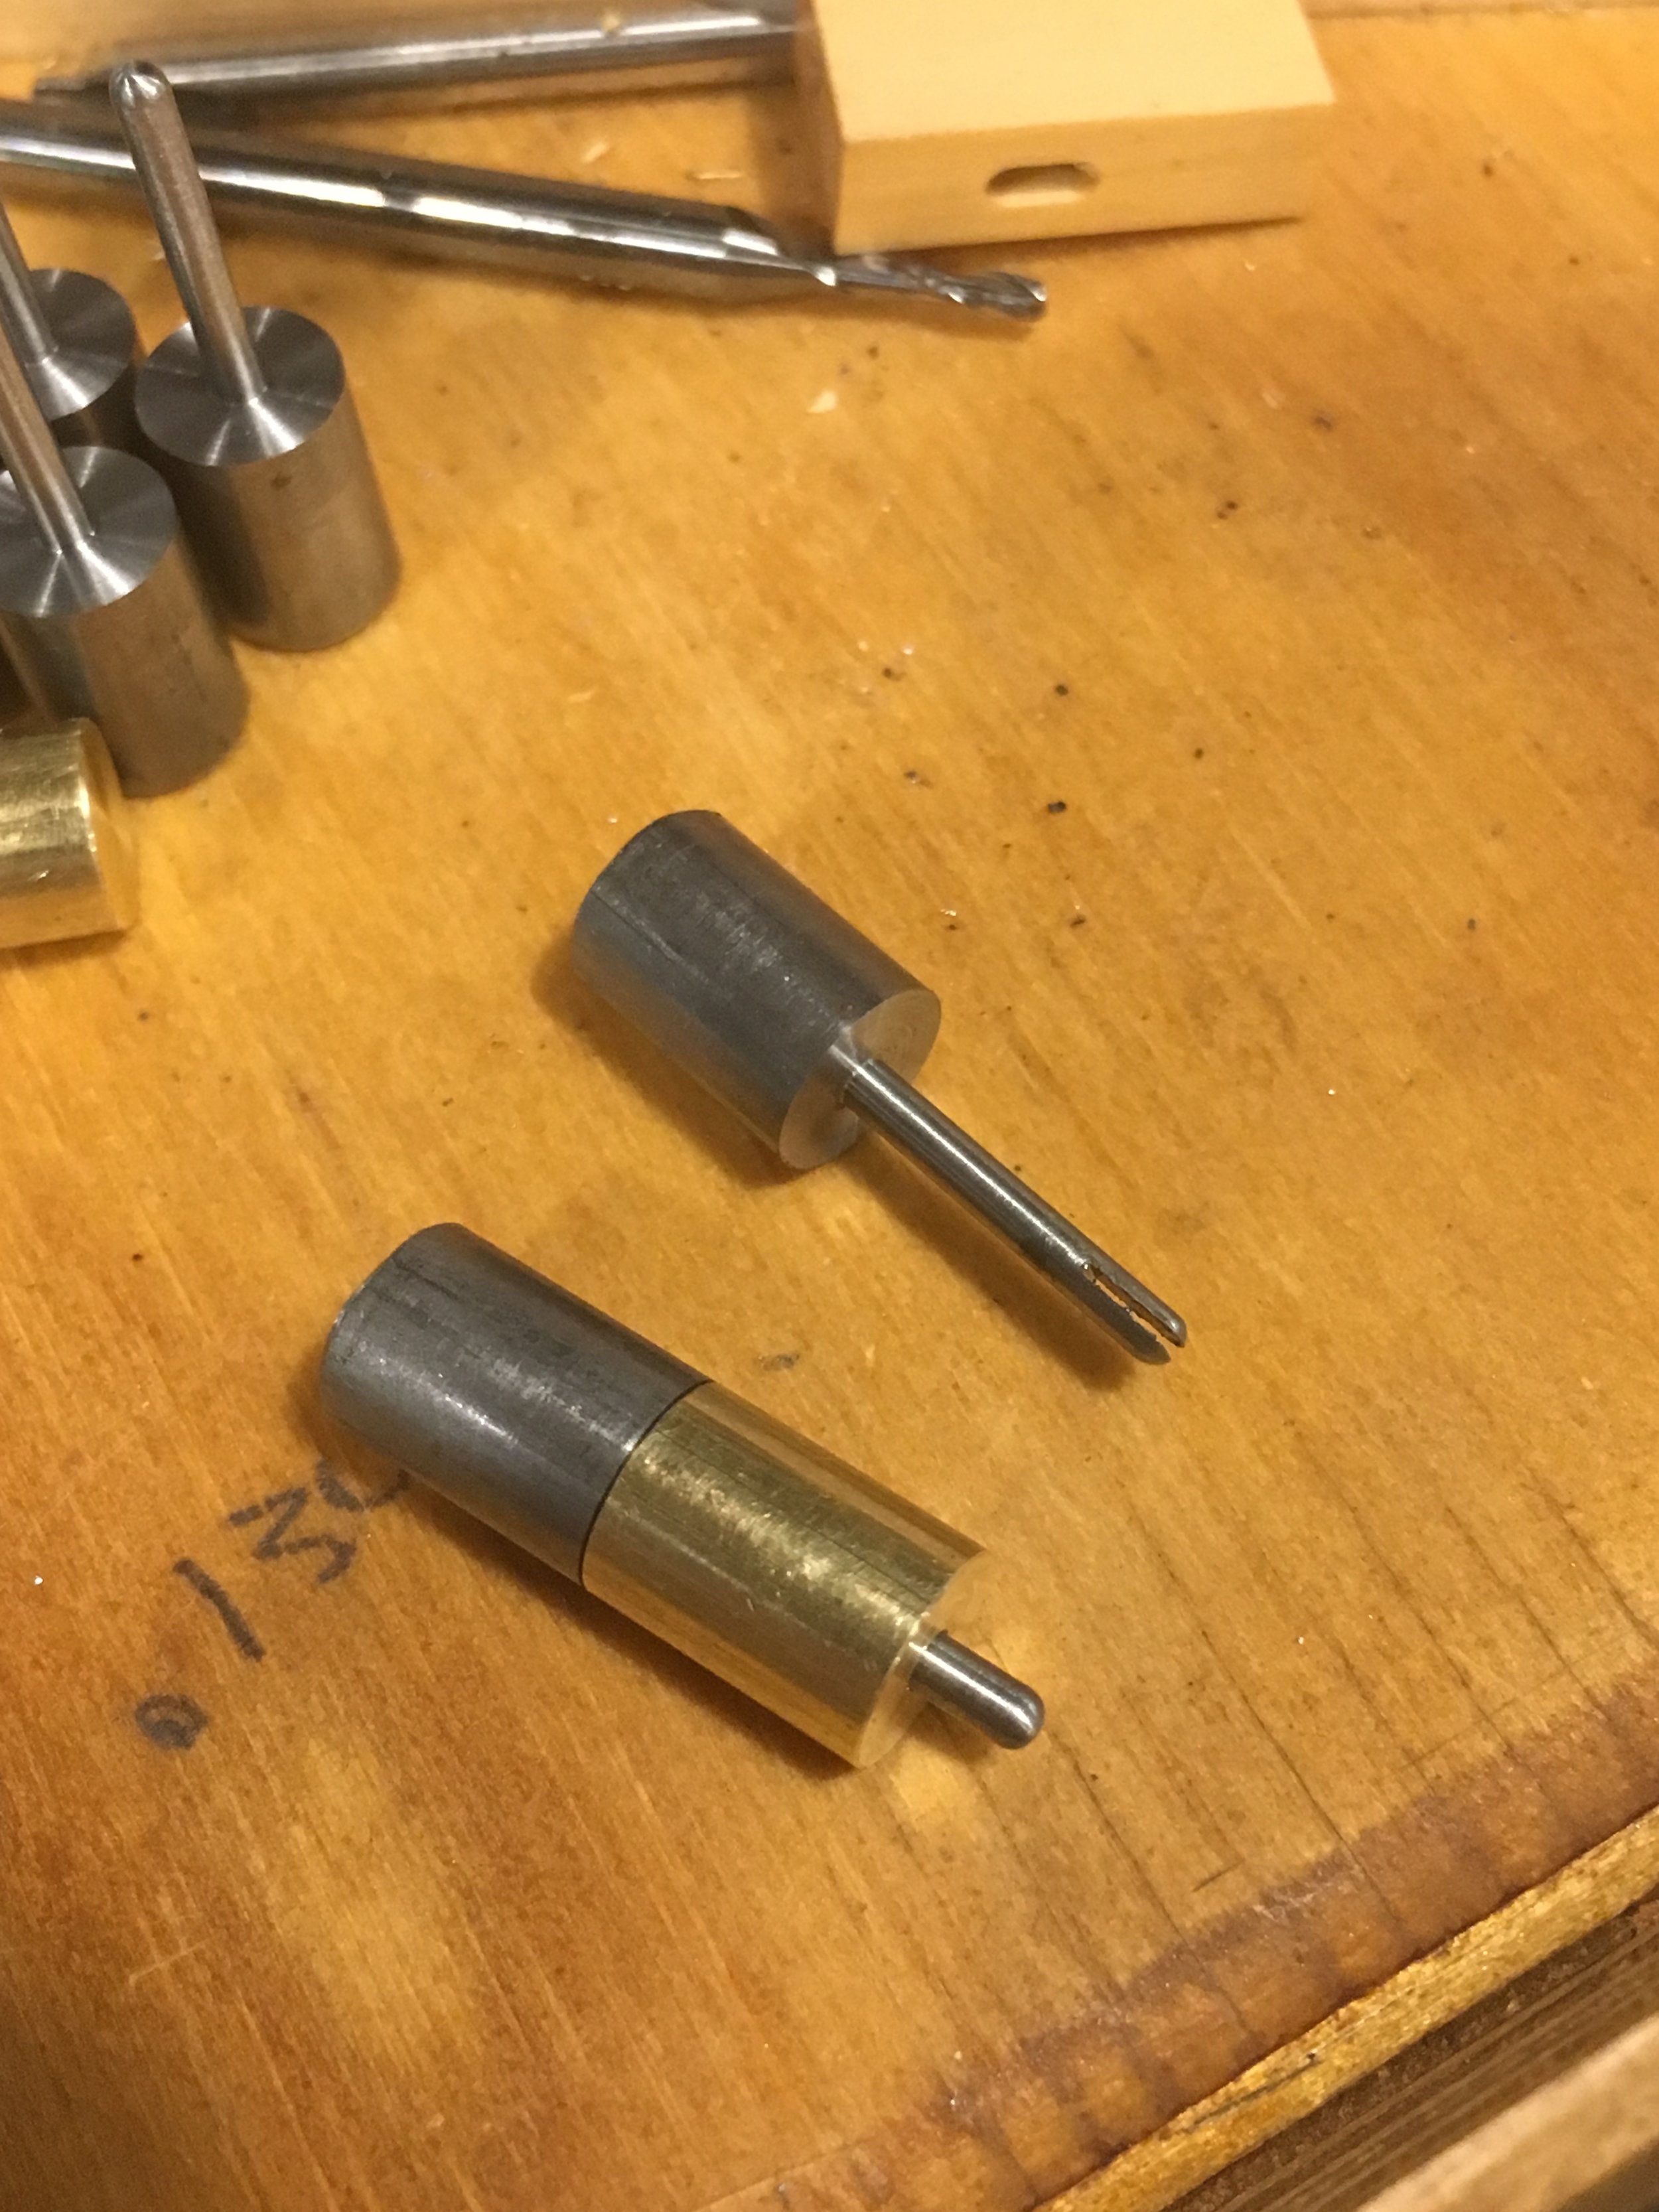
There is also another slot at an angle to hold the pins on the blade. I do not recall the exact degree. I made a little clam shell type fixture to hold the parts at the angle for slitting the pin slot. I am sure there is a better way, this is just the first thing I thought of and tried, it worked as planed.


After the slots were cut, I put the parts back in the lathe and turned down the opposite side to 1/16, leaving a section larger to sit against the handle. originally I wanted that part to be octagon to sit nice with the shape of the handles, after I made one I was not happy with how it looked aginst the frame of the saw. I decided to leave them round.

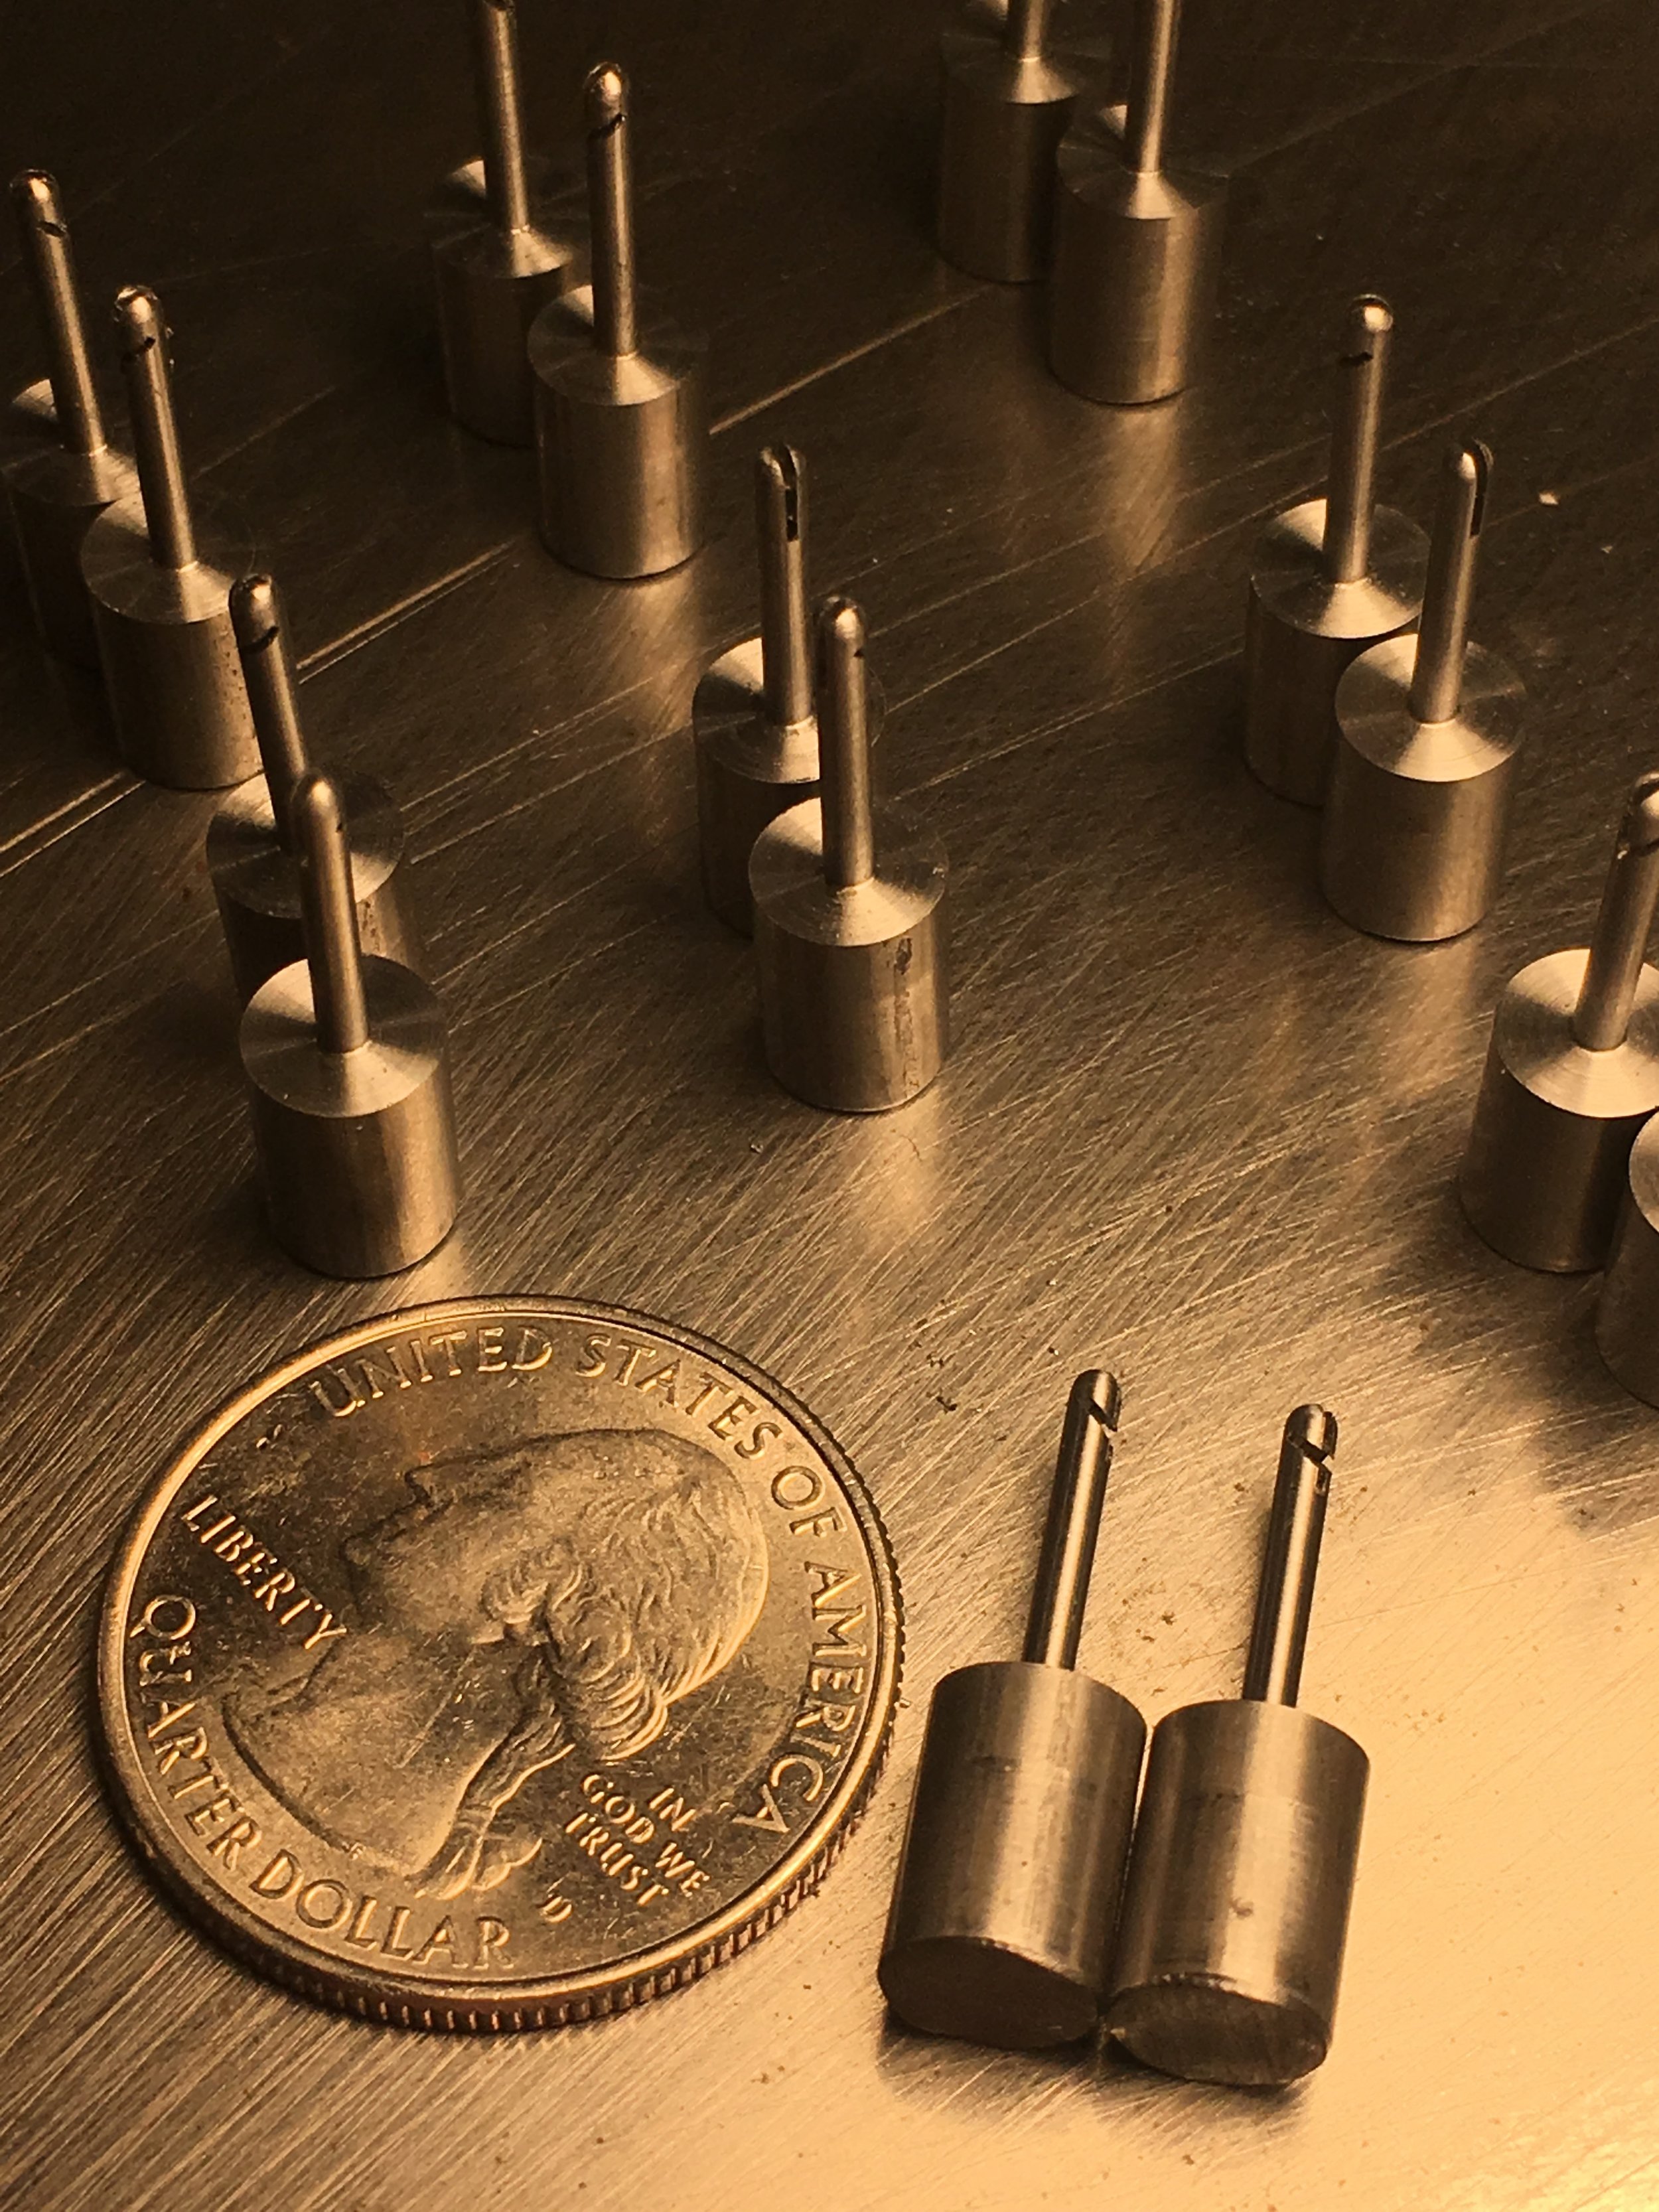
Octagon hardware test piece


Blades.
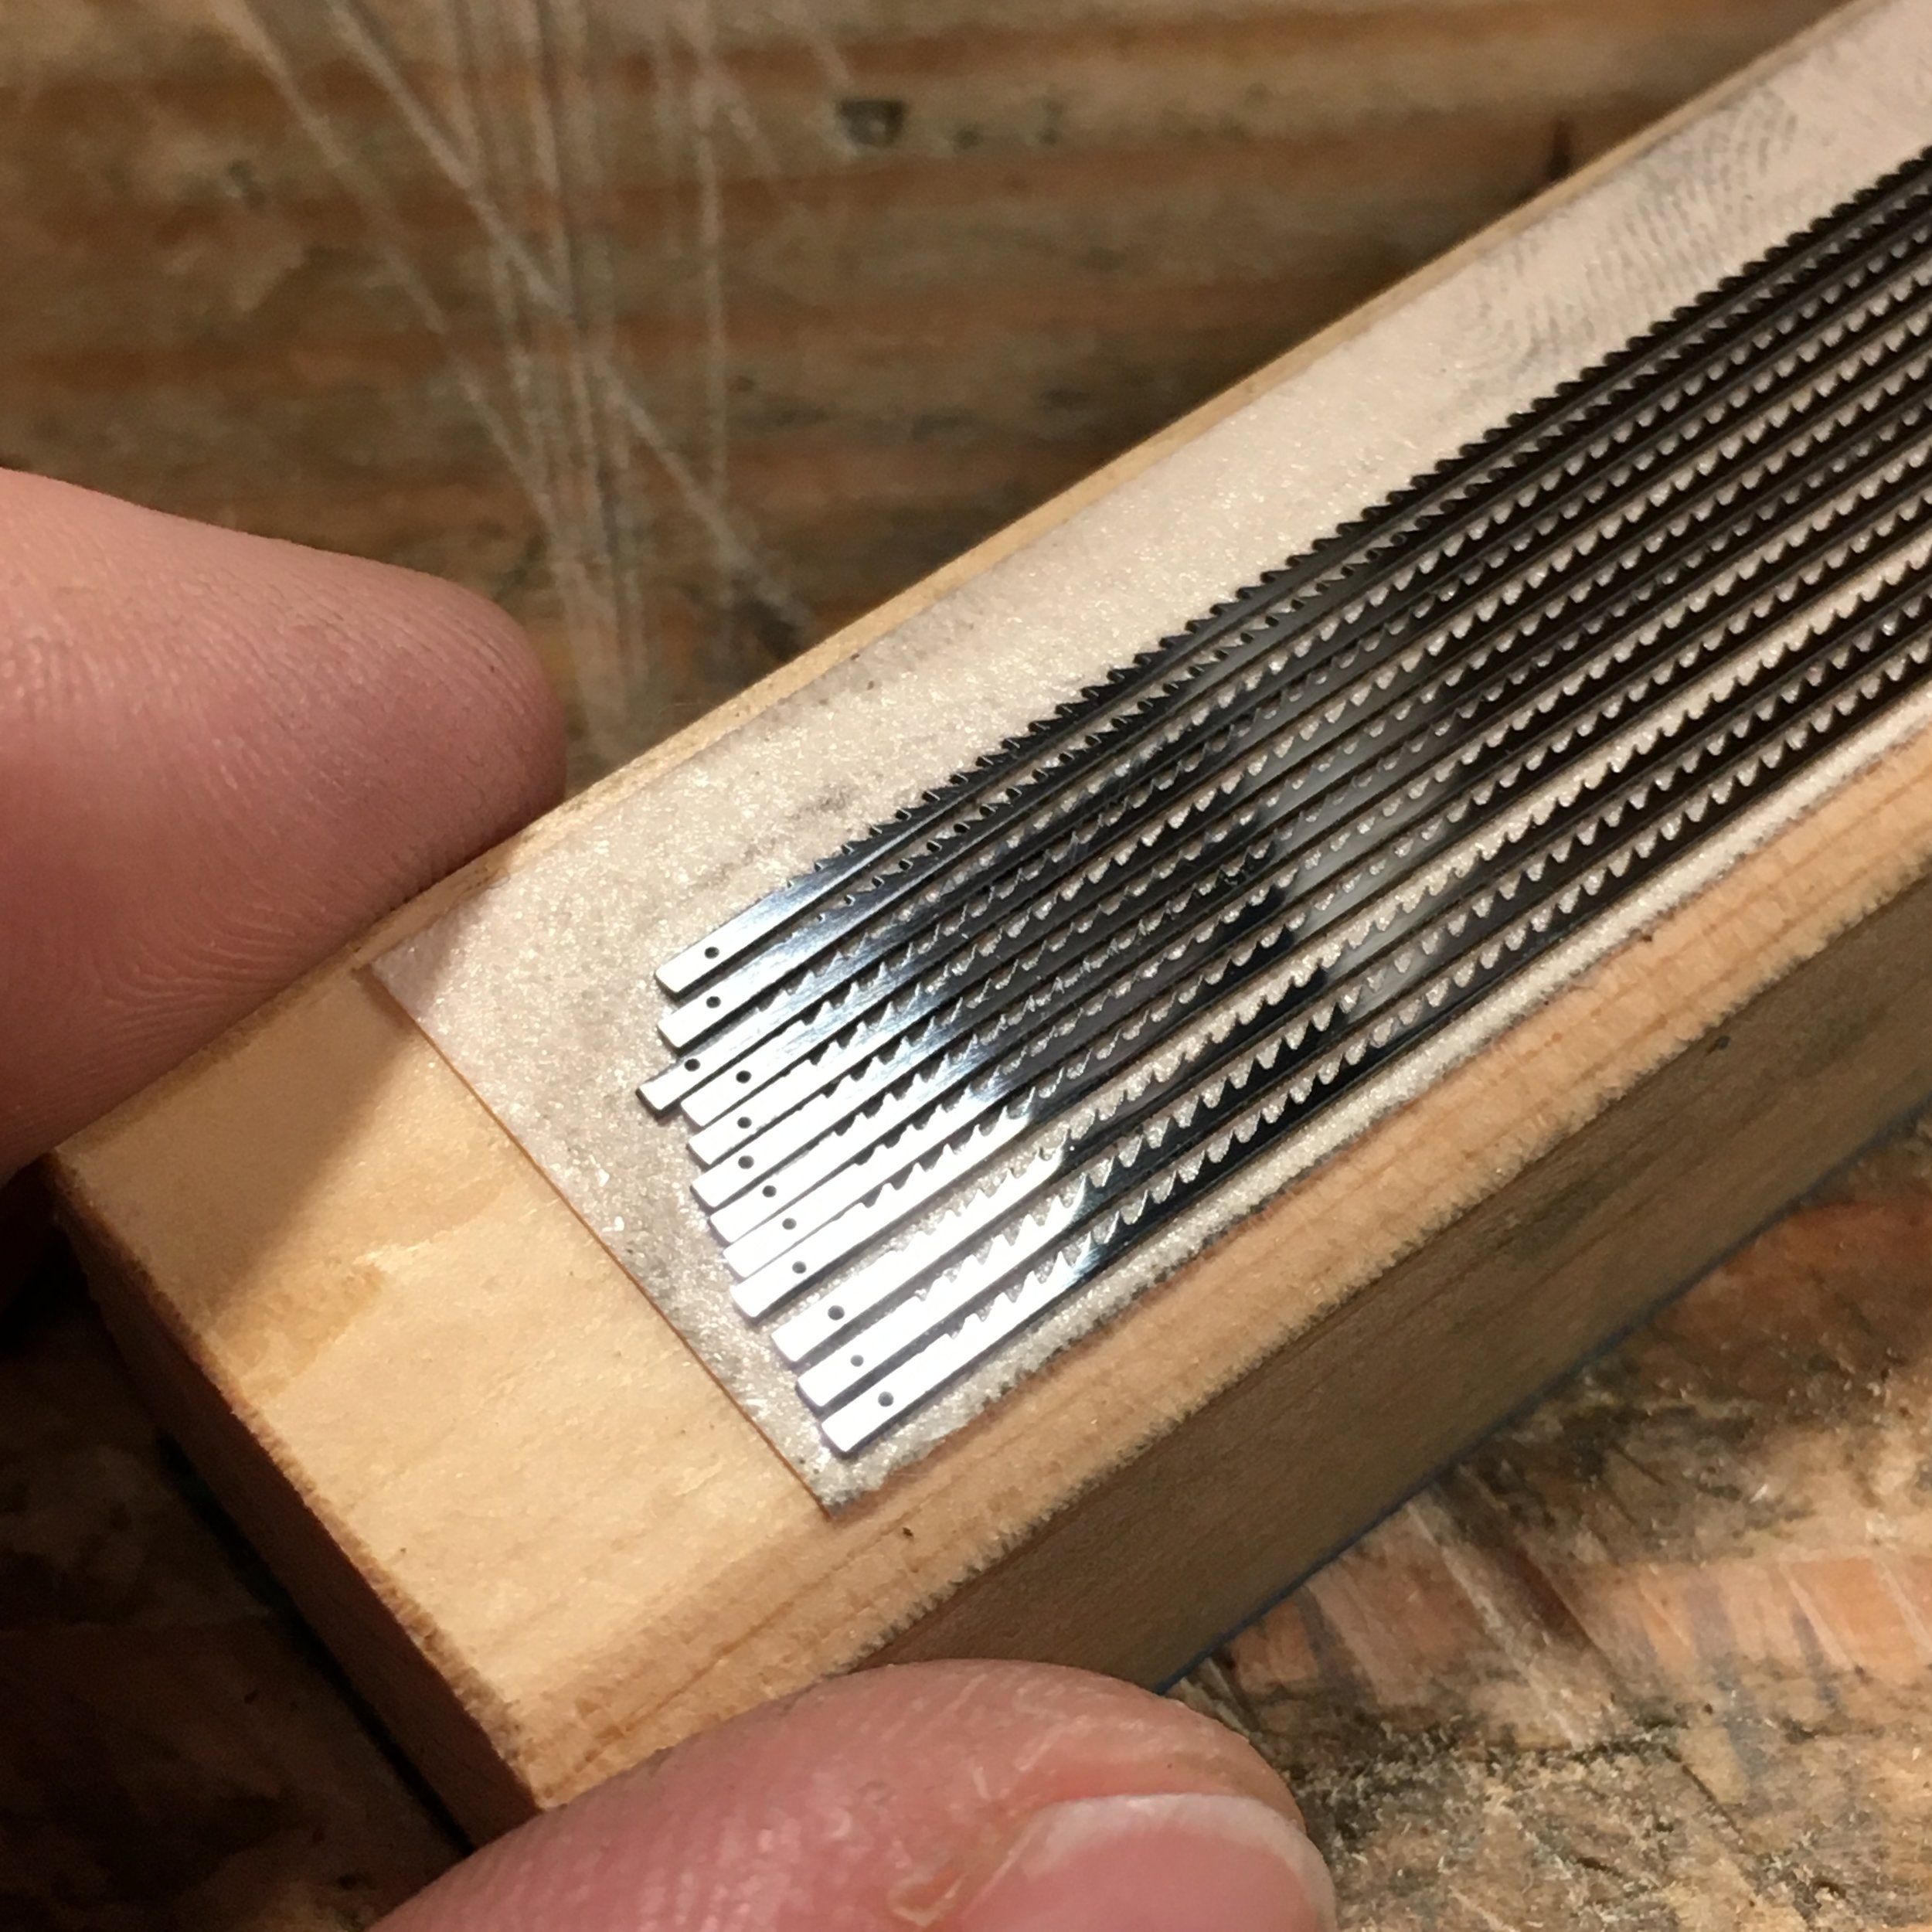
For blades I decided to use jewelers saw blades. They are available in the proper scaled TPI and width. The blades I used are about 40TPI. Although it is possible to make these, it is not practical when they are available in very high quality and material. It was not as easy and just using them, I had to cut them for length and add pins. I cut material off each end with a cut off wheel in a rotary tool. These blades are very hard, prior to drilling I attempted to anneal the ends by quickly heating them to cherry and sinking them into a warmed soft firebrick so they could cool slowly. Because they are so thin, they cool fast, so it did not become dead soft, just softer than they were. I drilled .015 holes in the blades with tiny carbide drills. I will admit to breaking at least 8 bits to do this. Once I had holes I soldered in wire for pins under the microscope. Once they were soldered I cleaned up the solder and trimmed the pins under the microscope. This whole process was pretty tedious. I then polished up the blades and waxed them.
Holes drilled. A couple of these are scrap, the bit walked too far off center.

Soldered pins prior to trimming

Finished Blades
Toggles
Toggles : The part of the saw that wraps around the string to holds the blade tension, often times it is just a rectangular stick.
I wanted to put some detail into the toggles, I also thought they would look nice if they matched the octagon handles. I whittled a few different shapes out of pine to give me a basic idea of size and form before proceeding to the good pieces. I settled on a tapered form and decided to cut them out on the pantograph the same way as the handles. I made a template in full scale, double sided in case the spin fixturing did not work I wanted to be able to use the template to just mill the basic shape. I only ever used one edge of the template in the end. Because there is little material at the bottom of the toggle, I had to cut each side a little at a time down to finished size, continually turning the indexing fixture so when I was down to the skinny area I did not have to touch the top end. There would be too much deflection to make a cut on the top once the taper was cut. It took a couple tries to get a feel for it.


Finishing.
Once all the parts were roughed out and fit together well, it was time for finishing. I take a lot of pride in achieving a nice finish. In my opinion, a poor finish is the easiest way to ruin a piece. Finishing usually takes much longer than all the other steps combined, the bow saws definitely went this way.
The limbs first needed to be rounded over on the outside curves and slightly crowned on the inside curves. I used calipers to scratch reference lines for a even round over. I used a few small jewelers files to shape the limbs round. At this stage everything has to be done extra carefully because of the amount of time already invested in the pieces. Once all the limbs were filed round, I sanded the curves starting with 320 grit working through the grits until the entire limb was sanded to 800 grit. The pantograph leaves tool marks, all these have to be carefully sanded out without effecting the overall form. There is a video of this on my instagram, I forgot to take pictures.
The handles, toggles, and stretchers were all sanded, removing all pantograph tool marks. The octagon handles and toggles had to be sanded very carefully so the facets remained flat. If you just go at it with sand paper in your finger it is very likely the facets will become wonky and rounded over. To help with this I double stick taped sandpaper to thick card stock paper, essentially making flexible sanding sticks. The card stock helps keep the sandpaper stiff enough to sand the facets without losing the crisp flat lines. I started with 400 grit, then 600 all the way to 800.
With all the wood parts sanded to 800 grit I started applying finish. I have used many different finishes on my work. Many years of thin shellac, thinned linseed oil, danish oil etc. I could talk about finish for a week. My favorite finish for small wood parts is hands down Birchwood Casey Tru-Oil gun stock finish. I believe it is just a secret mix of linseed oil, varnish, some metallic driers and other good stuff not allowed in California. I like Tru-Oil because it gives the rich color of a linseed oil, but dries in a day, and does not fade or get chalky over time. I applied the oil with a cotton swab and quickly wiped off the excess with a soft cloth. I did this twice allowing it to dry for a day in between. Once all the parts had 2 dried coats of oil I re-sanded all the parts to 1500 grit. I then did another 3 rounds of oiling over 3 days time, 0000 steel wool between the coats.
After the final coat of oil dried for a few days, I brushed every part once again with 0000 steel wool. Finally, I applied Renaissance wax (amazing wax) with a soft cotton cloth and buffed out to a nice satin sheen. Everything is handled with gloves at this point in the process.
To finish off the handles, I glued the steel hardware into the handles with a 2 part epoxy. I then waxed the steel to protect it from rust.

Oil bottle. Poke a pin hole in the foil seal and it will last much longer on the shelf.
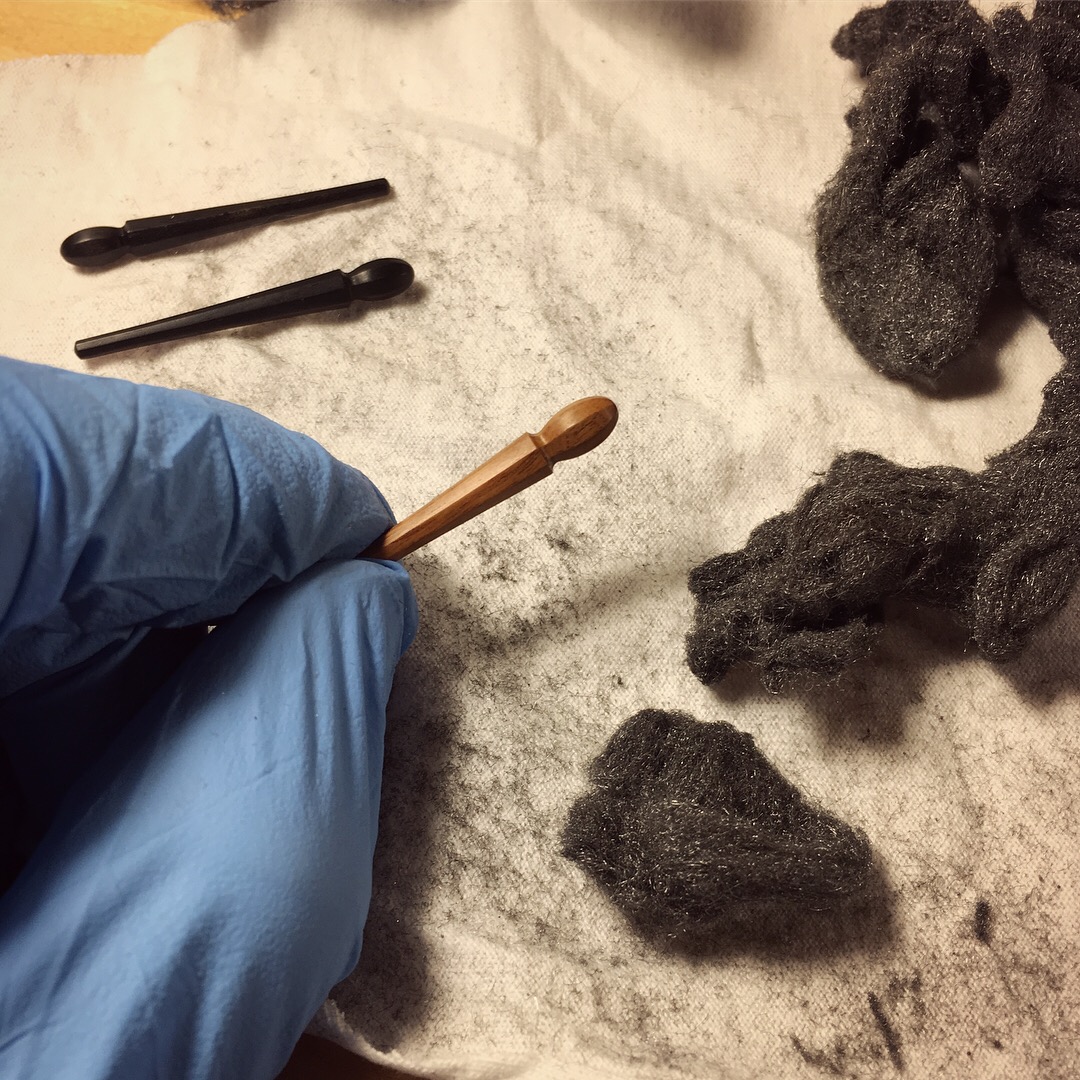
0000 steel wool before waxing

After 2 coats of oil finish.

Finished Toggles


Finished handles


Final assembly.
Once all the parts were finished and waxed it was time to assemble. In my experience this is the stage were it is most likely something can get messed up. Either a piece drops or something does not fit right and it has to be reworked and finished. I clean my work area and lay down white cloth so debris that may scratch are visible. I also use gloves to prevent my hand oils from effecting the wood and steel finishes.
The saws went together smoothly. I put the handles through the limbs, clipped the blade in the slots then put the stretcher in place. For tensioning string I used miniature twisted cotton rope that I found at the hobby shop. (it is sold for model ship makers) I wrapped around the limbs 3 times and tied the ends together. I pulled the knot tight and with a pin, put the smallest dot of thin CA super glue to keep the knot from ever slipping. You can see the thin glue wick down into the knot. I then placed the toggle through the loop and twisted it around until the blade was tight.

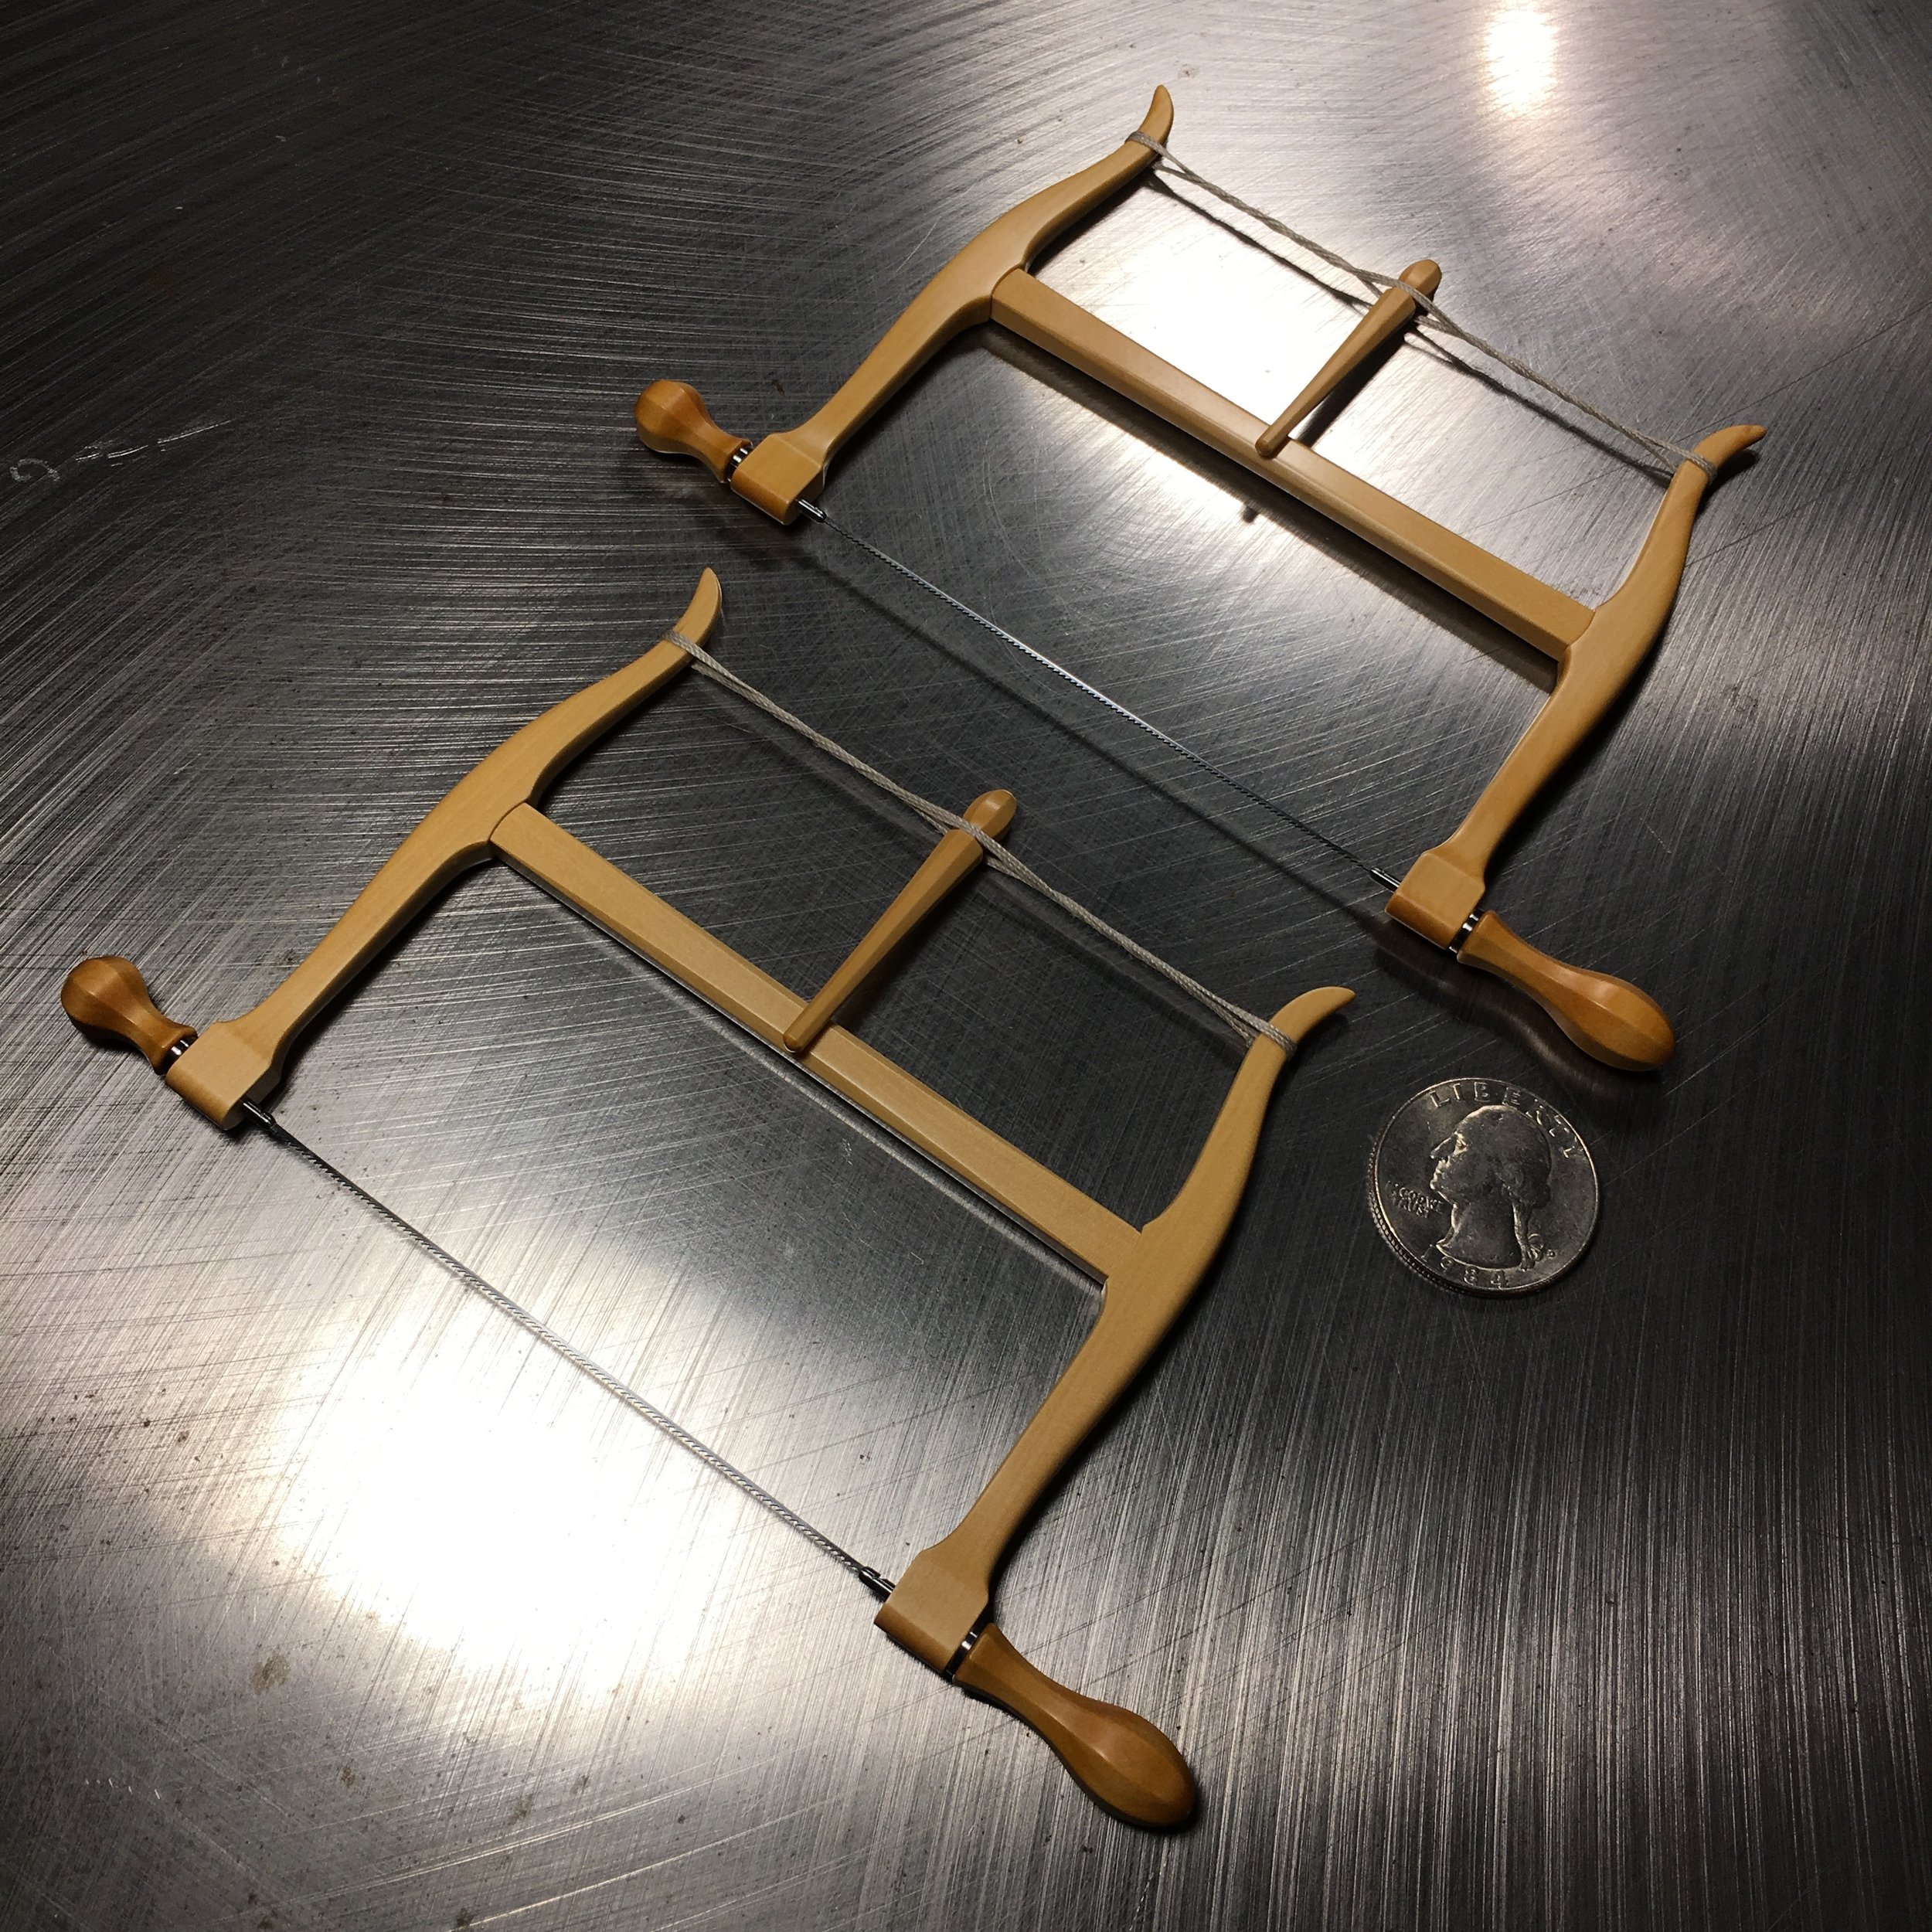
Boxwood


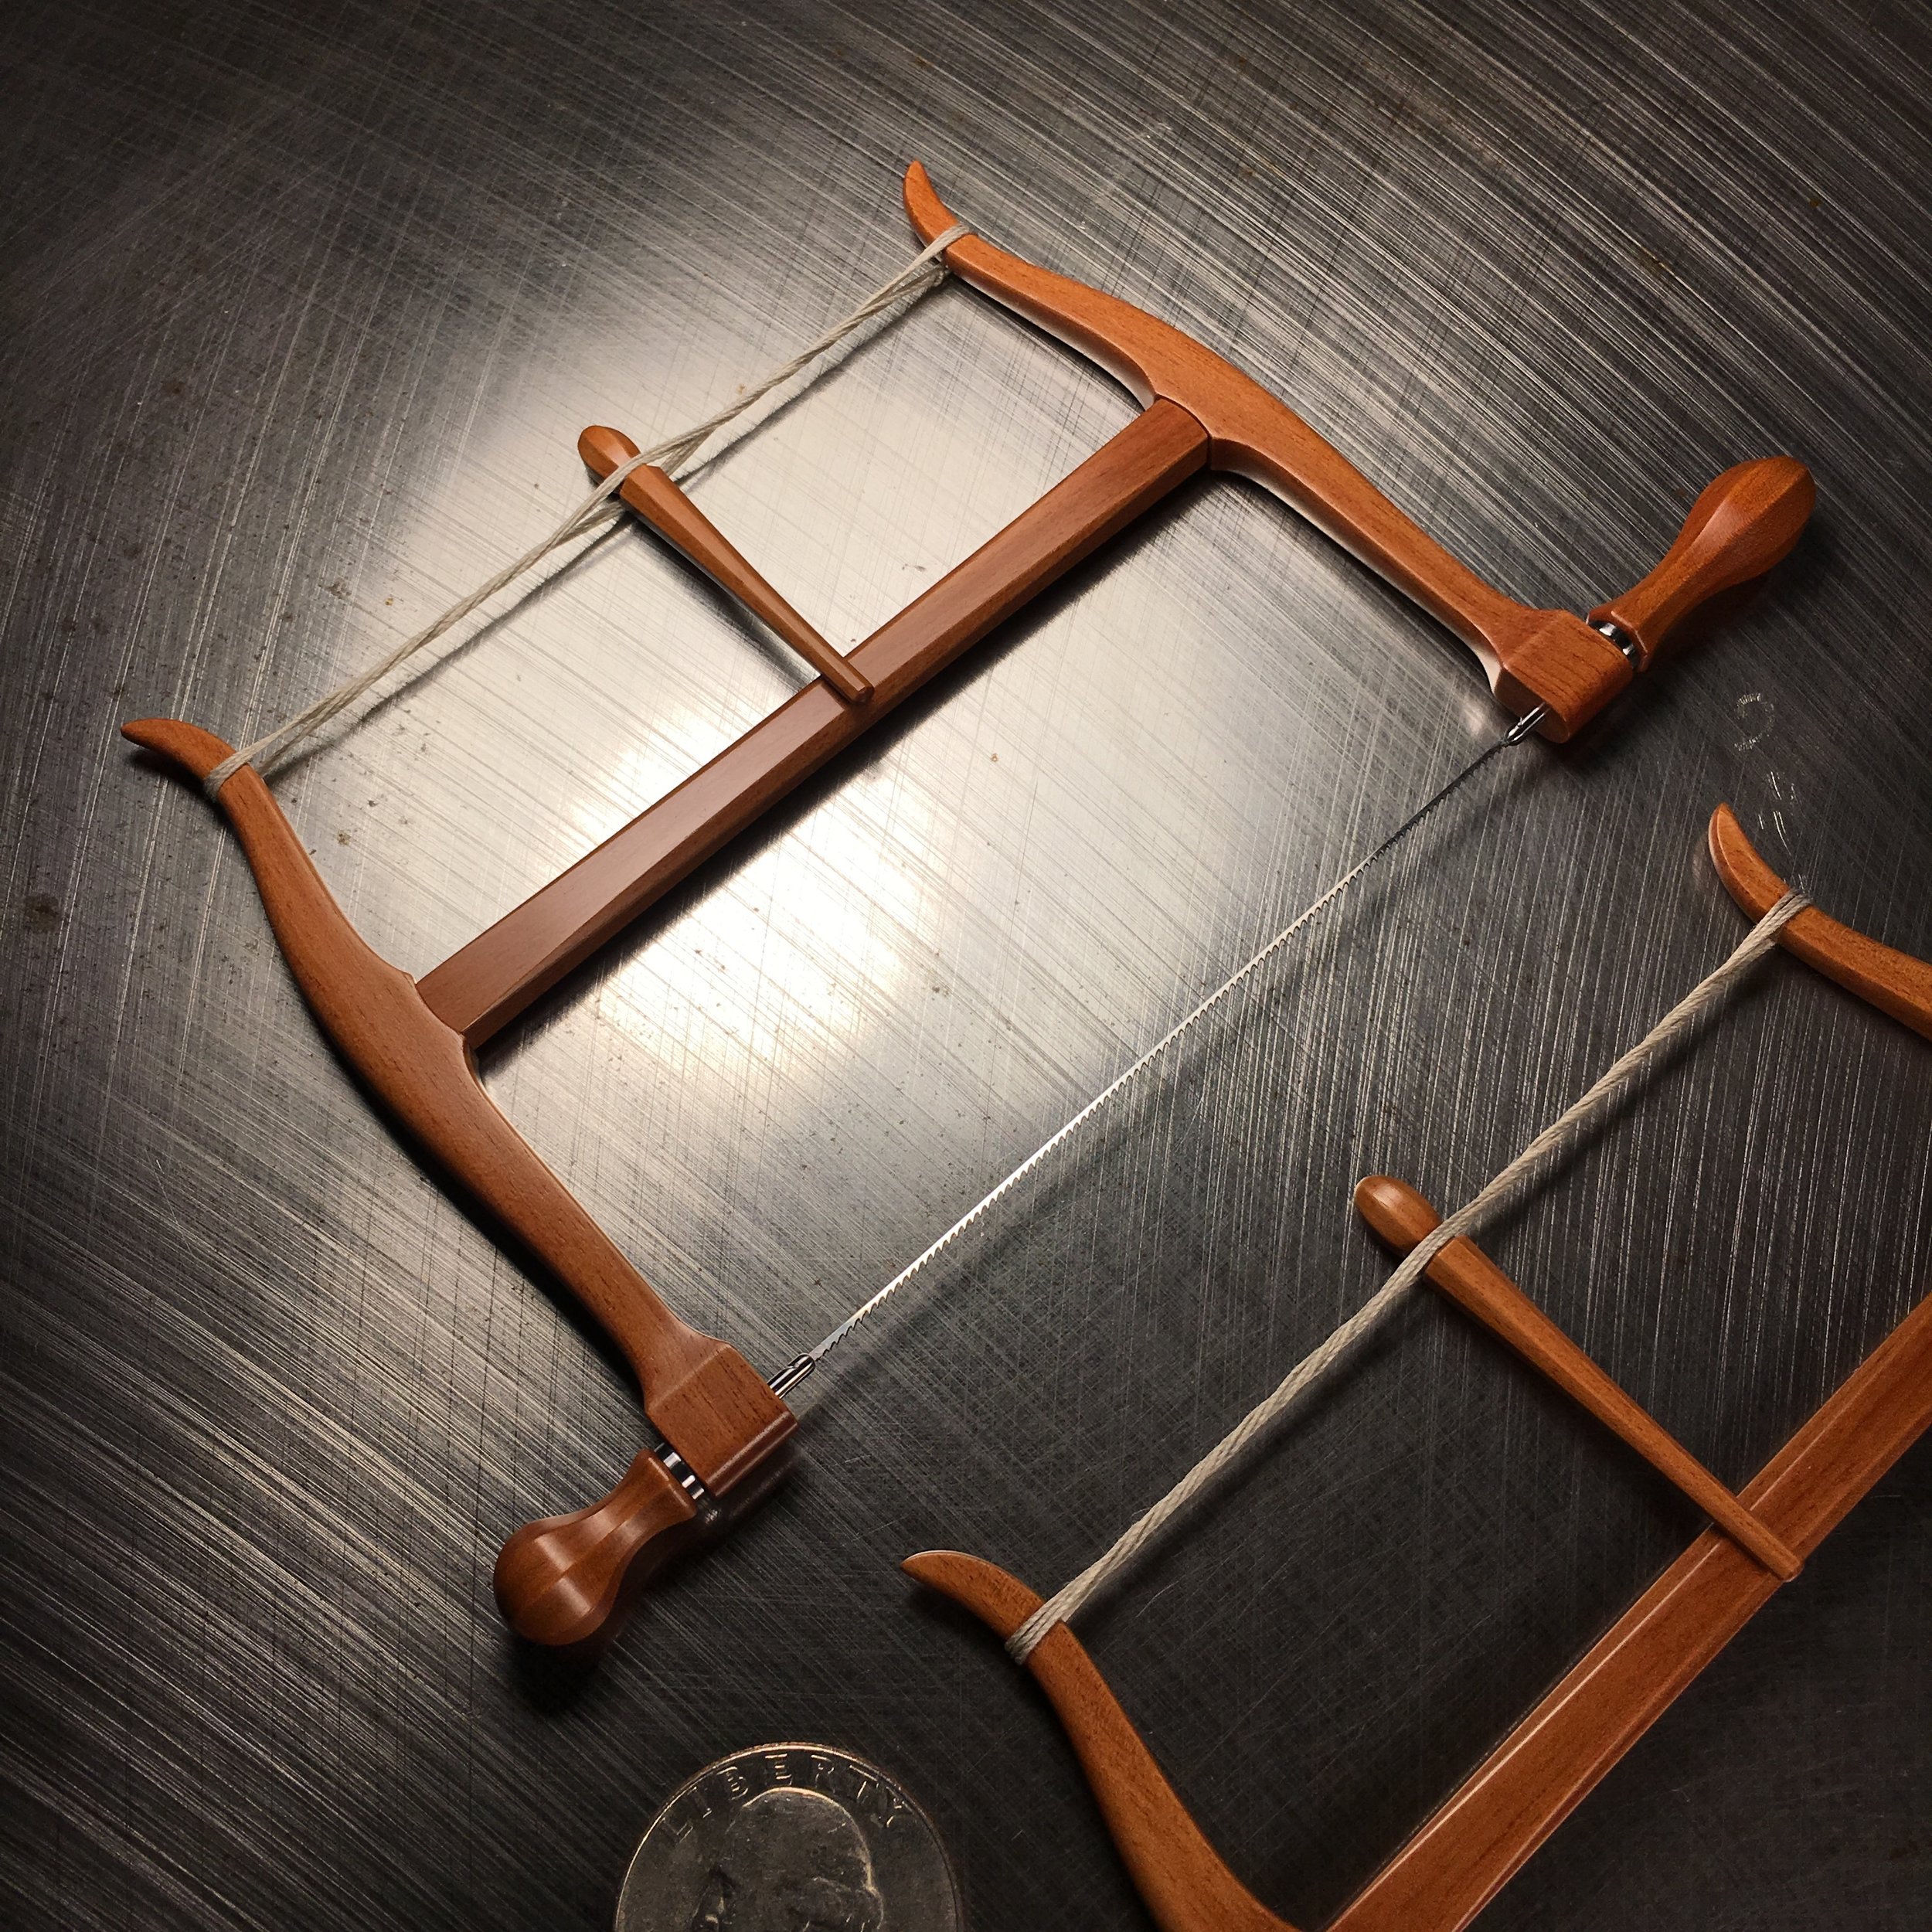
Mountain Mahogany


African Blackwood


(Bottom) Mountain Mahogany & Blackwood (Top) Boxwood & Rosewood